7-2: Light Up the Night
| 7-2: LIGHT UP THE NIGHT | |||
|---|---|---|---|

| |||
| General | |||
| Layer & Part | VIOLENCE /// SECOND | ||
| Challenge | Don't kill any enemies. | ||
| Music | Do Robots Dream of Eternal Sleep? | ||
| Tip of the Day | |||
Mannequins can be hard to hit due to their speed, but they lose air control when launched or shot down from a surface, making them unable to move for a short moment.
| |||
| Collectables | |||
| Enemies | |||
| Rank Requirements | |||
| Rank | Time | Kills | Style |
| S | 07:15 | 35 | 18,500 |
| A | 08:20 | 32 | 16,000 |
| B | 11:00 | 29 | 12,000 |
| C | 16:40 | 20 | 7,500 |
7-2: LIGHT UP THE NIGHT is the second level of Violence, taking place within the first ring of the layer, and introducing ![]() Yellow Hookpoints,
Yellow Hookpoints, ![]() Landmines, the
Landmines, the ![]() Gutterman, and the
Gutterman, and the ![]() Guttertank. The songs used for the level consist of Do Robots Dream of Eternal Sleep? for the starting area and Hear! The Siren Song Call of Death for the level's remainder.
Guttertank. The songs used for the level consist of Do Robots Dream of Eternal Sleep? for the starting area and Hear! The Siren Song Call of Death for the level's remainder.
Level
Start
The level begins in a white room with a single door and 4 inactive ![]() Mannequins standing in each corner. Heading through the door leads to a small hallway with a bottomless pit and a set of hookpoints at the far end of the room, which the player is prompted to hook across.
Mannequins standing in each corner. Heading through the door leads to a small hallway with a bottomless pit and a set of hookpoints at the far end of the room, which the player is prompted to hook across.
After crossing the first section, the player will be introduced to ![]() Yellow Hookpoints, which act as timers for doors and objects. Hooking onto a Yellow Hookpoint will temporarily activate an object the hookpoint is attached to and give the player a slight midair boost upwards. Until the hookpoint's timer has run out (indicated by a ticking sound), an activated Yellow Hookpoint will be dimmed and be unhookable.
Yellow Hookpoints, which act as timers for doors and objects. Hooking onto a Yellow Hookpoint will temporarily activate an object the hookpoint is attached to and give the player a slight midair boost upwards. Until the hookpoint's timer has run out (indicated by a ticking sound), an activated Yellow Hookpoint will be dimmed and be unhookable.
Activating the first Yellow Hookpoint will open a door leading to a winding corridor with a bottomless pit, followed by another hookpoint course, at the end, a Yellow Hookpoint is needed to open the door, where the player lands in a small room with a checkpoint.
Heading through the doors leads to a tall hallway with two pillars, each with a pair of inactive Mannequins holding a light source on top, approaching the door at the room's end will start the player's first encounter with a ![]() Gutterman, who barges into the room by crashing through the doors. Being an introduction to the enemy, a health bar appears to show the difference in damage between aiming at the body and shield.
Gutterman, who barges into the room by crashing through the doors. Being an introduction to the enemy, a health bar appears to show the difference in damage between aiming at the body and shield.
Outdoors
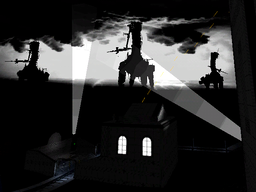
Emerging from the doors, the player will be met by a war-torn battlefield, spotlights and anti-aircraft fire light up the sky, with the silhouettes of ![]() Earthmovers visible in the distance, occasionally lit up by bolts of lightning. The surrounding area is dotted with various buildings and structures situated nearby the Phlegethon; a massive river made up of boiling blood, while the ground is made up from corpses of the dead. Most notably, a clock tower looms over the landscape.
Earthmovers visible in the distance, occasionally lit up by bolts of lightning. The surrounding area is dotted with various buildings and structures situated nearby the Phlegethon; a massive river made up of boiling blood, while the ground is made up from corpses of the dead. Most notably, a clock tower looms over the landscape.
A Terminal stands nearby the entrance, cut off from the rest of the level by the Phlegethon which flows before it. On the opposing side, a large foundation with a domed pavilion can be spotted. Using a chained platform suspended above the river as a bridge to cross the river, a prompt appears to inform the player on a method to break the ![]() Gutterman's shield:
Gutterman's shield:
KNUCKLEBLASTER. Swap arms with 'G'.
If the player doesn't have the Knuckleblaster equipped, the prompt instead reads:
KNUCKLEBLASTER. You should probably re-equip it.
Entering the pavilion will spawn a ![]() Swordsmachine and a
Swordsmachine and a ![]() Gutterman, who emerge from fallen drop pods. Killing either enemy will drop a second
Gutterman, who emerge from fallen drop pods. Killing either enemy will drop a second ![]() Gutterman on the platform.
Gutterman on the platform.
Clocktower
After the double ![]() Gutterman fight, two bombs will land on the top and bottom of the clock tower, causing it to collapse. Passing through the fallen building, the player faces off with two
Gutterman fight, two bombs will land on the top and bottom of the clock tower, causing it to collapse. Passing through the fallen building, the player faces off with two ![]() Mannequins who drop down from the ceiling above. Continuing onto the next section, two more
Mannequins who drop down from the ceiling above. Continuing onto the next section, two more ![]() Mannequins and three
Mannequins and three ![]() Soldiers spawn in. Further down the staircase, at the clock tower's foundation, a
Soldiers spawn in. Further down the staircase, at the clock tower's foundation, a ![]() Gutterman and
Gutterman and ![]() Sentry spawn in from fallen drop pods.
Sentry spawn in from fallen drop pods.
Train Station
Following the encounter at the bottom of the clock tower, a hallway leads the player to a tram station, where a locked gate separates the player from the tram needed to progress further. Moving to the next room; an open space with two glass walls, a wave of encounters will spawn in a ![]() Gutterman,
Gutterman, ![]() Stalker, 4
Stalker, 4 ![]() Mannequins and 2
Mannequins and 2 ![]() Cerberi. Killing all enemies allows the player to continue, where they complete a short parkour segment which incorporates
Cerberi. Killing all enemies allows the player to continue, where they complete a short parkour segment which incorporates ![]() Yellow Hookpoints hidden within large indents in the walls.
Yellow Hookpoints hidden within large indents in the walls.
Gate Control
Reaching a control panel, the player can open the previously locked gates and move along the tracks on the tram. The level exit, marked by text written on the wall in blood, points towards a large pile of rubble made up of trams, which can't be destroyed using weapons. A prompt appears when approaching the rubble:
Progressing further by boarding the tram and going into the opposite direction, the tram will follow the tracks until it is stopped by a closing barrier gate at a tram station. When attempting to reopen the gate, 2 ![]() Guttermen break out of their drop pods already present at the station, while opening the gate does not require killing the
Guttermen break out of their drop pods already present at the station, while opening the gate does not require killing the ![]() Guttermen, they can cause hindrance during the return trip.
Guttermen, they can cause hindrance during the return trip.
Red Skull Area
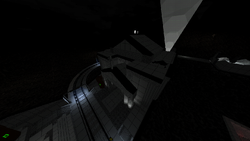
Following the tracks, the tram is lead inside a large two-story tram station where it stops. Players can spot a bomb hanging above the tracks, but require a Red Skull to to open the door that allows access to it, which can be acquired from an area to the side of the depot. Leaving the tram station via a door, the player follows a ruined bridge and trench riddled with ![]() Landmines, where they encounter a
Landmines, where they encounter a ![]() Gutterman. Proceeding to the next area, there is a partially flooded ditch in the ground covered in
Gutterman. Proceeding to the next area, there is a partially flooded ditch in the ground covered in ![]() Landmines. The Red Skull can be found in an enclosed pedestal opposing the entrance.
Landmines. The Red Skull can be found in an enclosed pedestal opposing the entrance.
When entered, a ![]() Guttertank will be dropped into the arena, with two more appearing after the first one is killed. Killing all
Guttertank will be dropped into the arena, with two more appearing after the first one is killed. Killing all ![]() Guttertanks lowers the Red Skull's casing and allows the Player to collect their key.
Guttertanks lowers the Red Skull's casing and allows the Player to collect their key.
Bomb Station
After placing the Skull Key on the pedestal, the player will traverse a third and final ![]() Yellow Hookpoint parkour course. The first obstacle; consisting of three Yellow Hookpoints and two gates, requires the player to quickly open the gate and hook onto the next hookpoint without falling. The next obstacle, a tall room with an endless pit and four hookpoints in each corner, three blocked with gates, has the same challenge, whereas the player is required to keep themselves suspended mid-air until they reach the Yellow Hookpoint which opens the door to the second floor.
Yellow Hookpoint parkour course. The first obstacle; consisting of three Yellow Hookpoints and two gates, requires the player to quickly open the gate and hook onto the next hookpoint without falling. The next obstacle, a tall room with an endless pit and four hookpoints in each corner, three blocked with gates, has the same challenge, whereas the player is required to keep themselves suspended mid-air until they reach the Yellow Hookpoint which opens the door to the second floor.
Once on the second floor, the player will be met by a large claw holding onto a large Bomb and a screen before it:
LOWER
Pressing the "Lower" button lowers the bomb onto the tram, which has to be driven all the way back to the first station. If the tram is not present, the screen will provide an error message:
ERROR
PAYLOAD
REQUIRES
TRAM
When the bomb is placed, the screen will change to a grim prompt similar to the one from approaching the rubble:
GIVE EM'
H E L L ,
KID
Ruined Exit
Once returned to the tram station, the player will be ambushed by a ![]() Guttertank and
Guttertank and ![]() Gutterman, along numerous
Gutterman, along numerous ![]() Landmines set up in the station. Once dealt with, the rubble blocking the level exit can be destroyed using the bomb, allowing access to the archive.
Landmines set up in the station. Once dealt with, the rubble blocking the level exit can be destroyed using the bomb, allowing access to the archive.
Forgotten Archive
Diving into the newly opened up floor, the player enters a room with towering bookcases. Across the room is an opened level exit door, but attempting to leave without paying attention to the taken path closes the door and spawns in 3 ![]() Guttertanks, with each death lowering bookcases until none are left. When fully cleared out, 2
Guttertanks, with each death lowering bookcases until none are left. When fully cleared out, 2 ![]() Guttermen will drop into the archive, with a third following soon after. Killing all remaining enemies will re-open the exit door and allow the player to clear the level.
Guttermen will drop into the archive, with a third following soon after. Killing all remaining enemies will re-open the exit door and allow the player to clear the level.
Challenge
To complete the challenge, the player has to finish the level without killing any enemies, utilizing different methods to complete each of the objectives. The player can skip the first ![]() Gutterman encounter by running past the enemy, and head directly outside, where the player then needs to skip the first outdoor encounter and the clock tower. Outside of the clock tower lies a small cross, which leads to a secret passage leading to the tram cart. After opening the gates and heading along the railway, the player can either rush to the gate control button in the arena with the dual
Gutterman encounter by running past the enemy, and head directly outside, where the player then needs to skip the first outdoor encounter and the clock tower. Outside of the clock tower lies a small cross, which leads to a secret passage leading to the tram cart. After opening the gates and heading along the railway, the player can either rush to the gate control button in the arena with the dual ![]() Guttermen, or jump off of the tram before activating it and let it sail past the gate, then go around and reactivate it for a much safer method.
Guttermen, or jump off of the tram before activating it and let it sail past the gate, then go around and reactivate it for a much safer method.
After reaching to the building with the Red Pedestal and bomb carrier, the player then needs to head back outside, skip the bridge and go to the outskirts of the Red Skull arena, making sure not to activate any enemies by stepping inside. The top of the Red Skull's case can be broken with explosives and then grabbed with the Whiplash to skip the encounter. The player should then head back into the building with the Red Pedestal and place the Skull onto it to continue through the normal path: going through the hookpoint section and placing the bomb onto the tram cart to head backwards to blow up the blocking carts, making sure to avoid the fire of the two remaining ![]() Guttermen.
Guttermen.
Once the player reaches the end room with the forgotten archives, the player then needs to travel through the room in a certain way to avoid activating the enemy encounter. A hint can be found earlier in the level for this section, located by the Gate Control station in a hidden room behind the gates, which can be accessed by leaving the gates closed and heading around the tunnel through the other side to lead to an open door. Entering inside leads to a small passageway with a book to read:
If you are one who seeks shelter, take heed: The archive is trapped. A single misstep and reprogrammed protectors will activate. Write these instructions down and follow them carefully if you wish to take refuge on the other side:
> < < > < < > > < > > < >
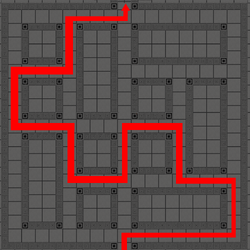
To cross the archive, the player needs to interpret the directions as turn signals, starting at the first square at the entrance and heading to the next square with each direction. > is turn right, and < is turn left.
If the player had successfully crossed the path without triggering the enemies, they will meet the end of the room where the exit gate should open and allow them to end the level.
Secrets
| #1 | |
| #2 | |
| #3 | |
| #4 | |
| #5 |
Alternate Shotgun
Slabs
Found by each of the timer hookpoint sections lies a hidden button slab, with three in total for each hookpoint section. These slabs are attached to the ![]() Impact Hammer, the alternate form of the
Impact Hammer, the alternate form of the ![]() Shotgun, and can be found at the following locations:
Shotgun, and can be found at the following locations:
- The first hookpoint section during the beginning of the level.
- The second hookpoint section at the tram station, found before gaining access to gate control and the cart.
- The third hookpoint section accessed after placing the Red Skull at the Bomb Station.
To access the slabs, the player needs to speed through the ![]() Yellow Hookpoint sections as fast as possible, as each are locked behind a grate which is tied to the timer of the first Hookpoint of each section. Speeding through will lead to a hidden passageway at the end of each section, which reveals the corresponding slab along with a nearby Hookpoint to exit the passageway.
Yellow Hookpoint sections as fast as possible, as each are locked behind a grate which is tied to the timer of the first Hookpoint of each section. Speeding through will lead to a hidden passageway at the end of each section, which reveals the corresponding slab along with a nearby Hookpoint to exit the passageway.
Failing the first timer section will require the player to reset the level due to the door closing behind the player, however the other two hookpoint sections can be redone after the player crosses the exit by backtracking. The first hookpoint is active for around 7 seconds before closing, the second one takes around 5 seconds, and the third one takes around 9 seconds.
Tram Station
After activating all three slabs, the player can then head to the large building found next to the Gate Control section.
Heading to the roof of the building, the player can find a small hole near the right side of the roof leading to a small room with a ![]() Soul Orb, an empty drop pod, and a
Soul Orb, an empty drop pod, and a ![]() Gutterman's coffin.
Gutterman's coffin.
If the coffin is broken open, a skeleton with a crushed head can be found inside, as well as a book. The book reads as follows:
I know I know I should not miss you so, but mother of me, I do. Your pained breaths that rasp'd and reverberated in your rusted iron tomb... The blood of your breast that nourish'd me and warmed me in its caress, when corpse and cruelty were all I witnessed...
Mother, mother... Mother of me,
I know I know you would hate me so, and mother of me, I do too. But I would not feel, not think, not dream, were it not for you in my rusted iron womb... Your tortured love brought me to this war, that I could take the heart of another, and need you no more.
Mother, mother... Mother of me,
Following the entrance to the foyer, a generic coffin can be found at the back of the room below a cross, and three indicators which light up based on the slabs that were activated.
If all slabs have been activated, the coffin will open, revealing a hole in the wall behind it. Entering the hole, another hole can be found in the floor leading to a tunnel.
In the tunnel, an unknown destroyed machine can be found wielding the ![]() Impact Hammer.
Impact Hammer.
Picking up the Alternate Shotgun will trigger a short prompt about alternate Variants:
They can be equipped at the SHOP.
Moving away from the area will trigger another prompt about the Alternate Shotgun itself:
Move fast to deal more damage.
After collecting the weapon, the player can return to the foyer and exit through the main doors, next to which a Terminal can be found.
Easter Eggs
- The drop pod models were directly taken from a custom Tundra level made by Vvizard, creator of the Developer Museum.
- The clock tower and clock gears correspond to the player's system time.
- Found inside the clock tower after skipping the first outdoor encounter and making it to the top, a lone
 Filth can be found sleeping on a bench.
- The "Z" icons were directly taken from the 2015 indie game Undertale
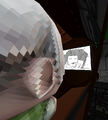
- Using cheats to no-clip into the bomb loaded onto the tram, a hidden Hakita plushie can be found watching an animation play on a screen, titled "Fuckin Finland" made by Frej.
- Within the animation itself, a reference to the comic "Loss" can be found.
- The
 Gutterman that appears during the ambush after getting the bomb does not have a coffin. This coffin can be found in the ceiling alcove in the #Gate Control station where the Alt Shotgun is unlocked.]]
Trivia
- The level's title is a reference to "Light Up The Night" from the album Act II: The Father Of Death by The Protomen.
- "Do Robots Dream of Eternal Sleep?" is a reference to the novel "Do Androids Dream of Electric Sheep?" by Philip K. Dick.
- The
 Earthmovers in the background do not appear if the cheat "Disable Enemy Spawns" is enabled.
 - The tower originally didn't have clocks; the addition was requested by 3D-Artist Victoria Holland who wanted to reference Bluesky/Twitter user Katie Tightpussy (@Juicysteak117) who drew a clock daily in Microsoft Paint for five months.
- It is the same clock used in the album cover for the Garden of Romance EP by Heaven Pierce Her, as well as his Bandcamp profile picture.
- "WE'RE GONNA NEED A BIGGER BOOM" is a reference to a line spoken in the 1975 movie Jaws.
- The unknown machine which holds the
 Impact Hammer has been referred to in the files and by its modeler and 3D artist Victoria Holland as "Excavator."
- The flag that the machine carries reads "Vegter van die volk", which is Afrikaans for "Warrior of the people".


