0-2: The Meatgrinder
| 0-2: THE MEATGRINDER | |||
|---|---|---|---|
| |||
| General | |||
| Layer & Part | PRELUDE /// SECOND | ||
| Challenge | Beat the secret encounter | ||
| Music | Unstoppable Force | ||
| Tip of the Day | |||
The Revolver deals locational damage.
A headshot deals 2x damage and a limbshot deals 1.5x damage. | |||
| Collectables | |||
| Enemies | |||
| Rank Requirements | |||
| Rank | Time | Kills | Style |
| S | 02:00 | 53 | 6,000 |
| A | 03:00 | 50 | 4,250 |
| B | 04:00 | 40 | 3,000 |
| C | 05:00 | 20 | 1,750 |
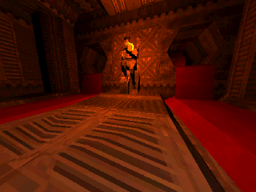
0-2: THE MEATGRINDER is the second level of Prelude, introducing the Terminal and Weapon Variants, various stage hazards, and houses the entrance to Prelude's secret level: 0-S: Something Wicked. 0-2 also introduces the ![]() Swordsmachine as a secret boss, which is fought as a standard boss in 0-3: Double Down. The song that plays in the level is Unstoppable Force.
Swordsmachine as a secret boss, which is fought as a standard boss in 0-3: Double Down. The song that plays in the level is Unstoppable Force.
Level
Elevator Entrance
0-2 introduces the Elevator Entrance, a small red and yellow hub that serves as the start to each level. Each Elevator Entrance has a tunnel leading to the level and a Terminal to the right. Entering into the level for the first time will have a barrier close off the entrance to the level, which requires the player to interact with the Terminal in order to unlock.
for new equipment.
Interacting with the Terminal will then open a selection of options with the player incentivized to head to the Weapons tab in order to purchase Variants for the ![]() Revolver, those being either the
Revolver, those being either the ![]() Marksman Revolver or the
Marksman Revolver or the ![]() Sharpshooter Revolver. The player can also access the Enemies tab to access useful information and lore, and the Cyber Grind and Sandbox tabs to enter those respective modes.
Sharpshooter Revolver. The player can also access the Enemies tab to access useful information and lore, and the Cyber Grind and Sandbox tabs to enter those respective modes.
The player can then access the level once the Terminal has been interacted with, with the player most likely purchasing a variant for the Revolver. A prompt will also appear on how to swap between the variants on a weapon once the player has exited the Terminal menu:
The tutorial and barrier will not appear again on subsequent replays or on new save files.
Start
Starting off past a small room with a statue, the player will enter a long hallway of glass panes, situated over a pit of deadly grinders. Walking forward will cause 8 ![]() Filth to spawn in with 4 in front of and behind the player.
Filth to spawn in with 4 in front of and behind the player.
Moving past into the next room, the player will enter a large dark room with a pit of grinders to the right and single lit door in front of the player. Walking towards it will catch a brief glimpse of a ![]() Swordsmachine running across the hallway before the door closes and the arena is lit up. 6
Swordsmachine running across the hallway before the door closes and the arena is lit up. 6 ![]() Filth and 4
Filth and 4 ![]() Strays will spawn in afterwards.
Strays will spawn in afterwards.
Crusher Hallways
After the previous arena, the player will enter a short three way hallway, before heading forward into a small room with a Crusher: hazardous presses which activate every few seconds. Making it forward will spawn 2 ![]() Filth underneath the Crusher, killing them almost immediately. Moving forward will lead into a small room with another Crusher, where 5
Filth underneath the Crusher, killing them almost immediately. Moving forward will lead into a small room with another Crusher, where 5 ![]() Filth and 2
Filth and 2 ![]() Strays will spawn in.
Strays will spawn in.
Following afterwards lies a long hallway with more crushers and hazards, with a Shredder Fan mounted to the wall next to the door and sets of Crushers down the hallway. Walking forward will spawn 2 ![]() Strays which will usually walk into the Crushers and get killed. Making it past the hazards and reaching to the end will cause 3 more
Strays which will usually walk into the Crushers and get killed. Making it past the hazards and reaching to the end will cause 3 more ![]() Strays to spawn in, only to be immediately killed by the previous
Strays to spawn in, only to be immediately killed by the previous ![]() Swordsmachine, before it runs off through a nearby door.
Swordsmachine, before it runs off through a nearby door.
Final Rooms
At the end of the Crusher hallways lies an intersection with the main forward path, a blocked door to the right, and an unlocked door to the left, which houses a Blue Skull Pedestal and a door leading to a long stretch of corridors that loop back to the start of the Crusher Hallways.
Heading through the path forward, the player will enter into a small hallway with a barrier dividing a copy of the hallway. Walking through will cause the ![]() Swordsmachine from earlier to head into the corridor beside the player. Waves of enemies will spawn in both hallways, with the player needing to face 2
Swordsmachine from earlier to head into the corridor beside the player. Waves of enemies will spawn in both hallways, with the player needing to face 2 ![]() Strays, then a set of 4
Strays, then a set of 4 ![]() Filth and 2 more Strays, while the
Filth and 2 more Strays, while the ![]() Swordsmachine slaughters the enemies spawned on it's side of the door. The
Swordsmachine slaughters the enemies spawned on it's side of the door. The ![]() Swordsmachine will then head into a door on it's side of the hallway once it has killed all the enemies on it's path.
Swordsmachine will then head into a door on it's side of the hallway once it has killed all the enemies on it's path.
The final arena afterwards contains a sloping hallway with various crushers and pits lining the middle of the room, with a stream of blood flowing down into a pit of crushers nearby the exit gate. A horde of 6 ![]() Filth and 5
Filth and 5 ![]() Strays will spawn in, with the Filth at the entrance and the Strays lined down the start and middle section of the hallway. Defeating the enemies will unlock the exit elevator.
Strays will spawn in, with the Filth at the entrance and the Strays lined down the start and middle section of the hallway. Defeating the enemies will unlock the exit elevator.
Challenge
This section covers the secret boss fight for Swordsmachine due to it being the challenge. For Swordsmachine's main boss fight, see 0-3: Double Down. For more detail on the enemy, see Swordsmachine.
For this level's challenge, the player needs to find and kill the ![]() Swordsmachine that has been seen elsewhere throughout the level. It's arena can be found by breaking a hidden grate in the room containing a Blue Skull Pedestal at the end of the Crusher Hallways. Sliding through leads to a series of small tunnels which the player has to slide through to get across. Heading straight ahead will lead to a small gap with a breakable cover, which leads above to the boss arena.
Swordsmachine that has been seen elsewhere throughout the level. It's arena can be found by breaking a hidden grate in the room containing a Blue Skull Pedestal at the end of the Crusher Hallways. Sliding through leads to a series of small tunnels which the player has to slide through to get across. Heading straight ahead will lead to a small gap with a breakable cover, which leads above to the boss arena.
The boss arena itself is a compact but tall room with a set of breakable pillars and glass panels surrounding the center of the room. Unlit before entering, activating the boss encounter with ![]() Swordsmachine will cause an orange beam of light to appear from the center of the floor, lighting the arena.
Swordsmachine will cause an orange beam of light to appear from the center of the floor, lighting the arena.
Secret Boss Encounter
The ![]() Swordsmachine is a melee-centric chaser, utilizing mostly swings and lunges alongside occasional hits from the
Swordsmachine is a melee-centric chaser, utilizing mostly swings and lunges alongside occasional hits from the ![]() Shotgun it wields during Phase 1. All of it's melee attacks are parriable and easily cued, allowing the player to deal significant damage along with regaining their health and stamina, with the downside of the Swordsmachine becoming Enraged, making it much faster and more aggressive. Otherwise, staying away from Swordsmachine is crucial for survival, especially with the limited space making dodging it's attacks difficult. Staying on the walls can dodge almost all of Swordsmachine's attacks, with only the Shotgun blast on Phase 1 and Sword Throw on Phase 2 being ranged.
Shotgun it wields during Phase 1. All of it's melee attacks are parriable and easily cued, allowing the player to deal significant damage along with regaining their health and stamina, with the downside of the Swordsmachine becoming Enraged, making it much faster and more aggressive. Otherwise, staying away from Swordsmachine is crucial for survival, especially with the limited space making dodging it's attacks difficult. Staying on the walls can dodge almost all of Swordsmachine's attacks, with only the Shotgun blast on Phase 1 and Sword Throw on Phase 2 being ranged.
Chip damage from the ![]() Piercer and
Piercer and ![]() Marksman Revolver variants, along with
Marksman Revolver variants, along with ![]() Shotgun usage with Shotgun Swapping and Projectile Boosts being useful for damage. The Shotgun can also parry with a point blank shot for extra damage, making it very useful to utilize against Swordsmachine's attacks.
Shotgun usage with Shotgun Swapping and Projectile Boosts being useful for damage. The Shotgun can also parry with a point blank shot for extra damage, making it very useful to utilize against Swordsmachine's attacks.
Reaching Swordsmachine's second phase will cause it to kneel on the ground after losing it's arm and Shotgun, giving the player an opportunity for extra damage. During Phase 2, Swordsmachine will use more ranged attacks along with it's normal set of moves, including throwing it's sword as a projectile towards the player and a horizontal spiralling attack.
Defeating the Swordsmachine will allow the player to return back through the tunnel, and if the player had not collected the Shotgun beforehand, will also grant them the ![]() Core Eject Shotgun early after it is dropped on the first phase.
Core Eject Shotgun early after it is dropped on the first phase.
Secrets
| #1 | 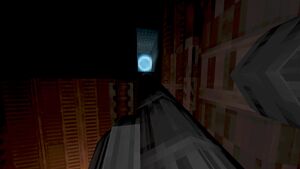
| |
| #2 | 
| |
| #3 | 
| |
| #4 | 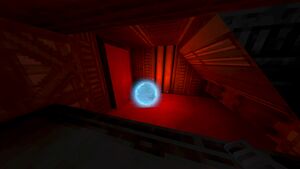
| |
| #5 | 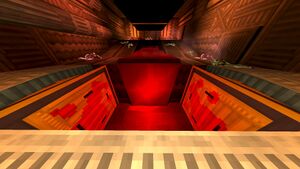 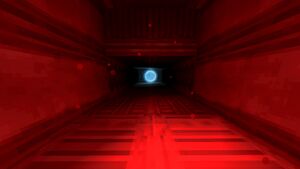
|
Secret Level Entrance
To access the Secret level of Prelude: 0-S: Something Wicked, the player needs to find a Blue Skull Key hidden by the three way corridor after the first glimpse of ![]() Swordsmachine, leading into the Crusher Hallways. In the corner of the room lies a displaced tile of the ceiling, which leads to a large hole above. Slam jumping, then wall-jumping up the sides of the shaft will lead to a small dark room with a Blue Skull. After picking it up with punch, the player then needs to head to the end of the Crusher Hallways and head into the left door. Inside lies a Blue Pedestal which the player can activate in order to open a door by a nearby wall. The player can then jump into the revealed secret elevator.
Swordsmachine, leading into the Crusher Hallways. In the corner of the room lies a displaced tile of the ceiling, which leads to a large hole above. Slam jumping, then wall-jumping up the sides of the shaft will lead to a small dark room with a Blue Skull. After picking it up with punch, the player then needs to head to the end of the Crusher Hallways and head into the left door. Inside lies a Blue Pedestal which the player can activate in order to open a door by a nearby wall. The player can then jump into the revealed secret elevator.
Trivia
- The
 Swordsmachine follows a consistent route through the level, with a course of locked arenas and combat encounters parallel to the player's own.[1] The beginning and end of Swordsmachine's personal level are each related to the mission's biggest secrets.
- The parallel level encounters, and particularly the side-by-side combat arenas towards the end of the level, are inspired by the Cameo System in Devil May Cry 5.[2]
- Though vulnerable to damage in all its physical appearances in this level, the Swordsmachine in cutscenes has an inflated health bar to make it difficult to kill in unintended situations. However, the exact health it has and the thresholds at which it'll transition into its second phase vary based on the cutscene it is spawned for.
- For the initial doorway cameo, Swordsmachine has 175 health total, 160 health in its first phase and 15 health in its second phase. Swordsmachine in this scene also spawns directly under the ceiling vent before walking past the door, reinforcing the implication that it enters the level through here.
- For Swordsmachine's first visible combat arena, it has 250 health total, 235 health in its first phase and 15 health in its second phase. This instance of Swordsmachine immediately despawns upon exiting the room, and so it cannot be observed again until the Crusher Hallway.
- In the Crusher Hallway cutscene, Swordsmachine has 250 health total, 175 health in its first phase and 75 health in its second phase. Before this Swordsmachine despawns, it trails off toward the room with the Red Soul Orb rather than turning to enter the next arena.
- In the Parallel Arenas, Swordsmachine has 250 health total, 150 health in its first phase and 100 health in its second phase.
- The blood and gore of enemies killed by Swordsmachine can be found in the rooms where it fights off-screen even if blood and gore has been disabled in settings.
- The corpses of
 Schisms can be found in the rooms where Swordsmachine fights off-screen, a full level before their proper first appearance in 0-3: Double Down.
 - If you move fast enough, it is possible to reach the door the Swordsmachine goes through in the crusher hallway while it is still open. Unfortunately, even though the door is open, an invisible wall blocks V1 from following the Swordsmachine through.
- When Swordsmachine is seen at the end of the Crusher Hallway, it will often miss one or more of the
 Strays.
 - The Blind Enemies cheat breaks some elements of this mission, making it unbeatable; for instance, the door at the end of the Grinder Arena becomes impassable, even when it opens.
- In the first hallway in the level, it is possible to climb on top of the doorframe you entered through by jumping while holding crouch. From there, the player can clip on top of the hallway. Doing this causes the message '"WHAT'S UPDOOR?" T. HAKITA' to display. This clip is one of several that have been manually preserved for the speedrunning community when the bugs that enabled them were eventually patched out during Early Access.
- If a Stray's body is completely destroyed in combat, their torso will show in the entrance of the start elevator; this is exclusive to 0-2 and 5-S: I Only Say Morning (with cheats).
- This applies to 4-2 as well, though it applies to a Schism insteam of a Stray.
