1-3: Halls of Sacred Remains
| 1-3: HALLS OF SACRED REMAINS | |||
|---|---|---|---|
| |||
| General | |||
| Layer & Part | LIMBO /// THIRD | ||
| Challenge | Beat the secret encounter. | ||
| Music | Castle Vein | ||
| Tip of the Day | |||
Enemies can hurt other enemy types.
With quick thinking and positioning, powerful enemies can turn into powerful weapons. | |||
| Collectables | |||
| Enemies | |||
| Rank Requirements | |||
| Rank | Time | Kills | Style |
| S | 08:00 | 125 | 14,000 |
| A | 10:00 | 100 | 10,000 |
| B | 12:00 | 61 | 7,500 |
| C | 18:00 | 40 | 3,000 |
1-3: HALLS OF SACRED REMAINS is the third level of Limbo, which introduces Split Color Doors, Soap, the formal introduction of ![]() Cerberi as regular enemies, and starring the
Cerberi as regular enemies, and starring the ![]() Hideous Mass as a boss encounter. 1-3 also houses a secret encounter with the Swordsmachines:
Hideous Mass as a boss encounter. 1-3 also houses a secret encounter with the Swordsmachines: ![]() Agony and
Agony and ![]() Tundra. The song used in this level is Castle Vein.
Tundra. The song used in this level is Castle Vein.
Level
Start
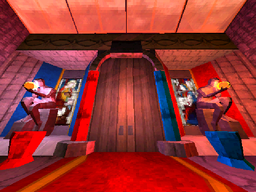
Starting off the level, the player enters into a castle-like room with a skylight and stained glass paintings. At the far end of the room lies a unique Split Color Door, a locked door that connects to two different pedestals but only requiring one to open. A prompt will appear once the player enters the room to inform about the Split Color Door.
If you do not seek hardship, stay indoors.
To the left and right of the split gate lies two doors, leading to 2 different paths through the level. The right door leads to the Blue Path: easier but taking longer to traverse. To the left is the Red Path: harder with more difficult enemy encounters but with fewer rooms. The player has a choice of choosing either one or both of the paths to complete.
Blue Skull Path
Taking the right pathway to the Blue Skull will continue inside the castle, first leading into an intersection between two different paths that loop around back to the start. Taking the right door leads into a hallway lined with a bed of flowers. 2 ![]() Schisms and a
Schisms and a ![]() Streetcleaner will spawn at the far end of the hallway from the player's entrance.
Streetcleaner will spawn at the far end of the hallway from the player's entrance.
The door leading afterwards descends down a large stairway situated over massive pool of lava. Traversing up or down the staircase will trigger waves of enemies to spawn as the player continues forward. Starting from the top of the staircase: a wave of 4 ![]() Filth and a single
Filth and a single ![]() Drone , then a set of 4
Drone , then a set of 4 ![]() Strays and a
Strays and a ![]() Schism and finally a
Schism and finally a ![]() Malicious Face at the bottom of the stairs.
Malicious Face at the bottom of the stairs.
The next room after is a small room separated by with a flowing stream of lava, with two stairs leading down to the door. Entering inside will spawn 3 ![]() Strays and 3
Strays and 3 ![]() Drones on the opposite side of the room from the player.
Drones on the opposite side of the room from the player.
The player then enters into a tall room with a winding set of stairways leading up to a door on the far wall from the previous entrance. A Blue Skull Key sits nearby the bottom entrance for the player to collect and bring to the split door. Heading up the stairs will spawn enemies as the player traverses upwards or downwards.
Starting from the bottom, a wave of 8 ![]() Filth and 4
Filth and 4 ![]() Strays will spawn at the first turn, then a group of 4
Strays will spawn at the first turn, then a group of 4 ![]() Strays and a
Strays and a ![]() Schism at the second turn at the top, and then a group of 3
Schism at the second turn at the top, and then a group of 3 ![]() Schisms and 3
Schisms and 3 ![]() Drones placed on either side of a gap within the walkway. The player can then head into the door situated at the left of the walkway's end.
Drones placed on either side of a gap within the walkway. The player can then head into the door situated at the left of the walkway's end.
The next room after the Blue Skull is a narrow stairway with a ![]() Cerberus statue at the bottom of the stairs. Attempting to walk up the stairs spawns in 11
Cerberus statue at the bottom of the stairs. Attempting to walk up the stairs spawns in 11 ![]() Filth onto the stairway, along with triggering the
Filth onto the stairway, along with triggering the ![]() Cerberus to awake. Following after lies a hallway with 2
Cerberus to awake. Following after lies a hallway with 2 ![]() Drones and 2
Drones and 2 ![]() Streetcleaners spawning on the opposite side from the player.
Streetcleaners spawning on the opposite side from the player.
Afterwards, the player enters into a tall cramped room with a shaft in the middle leading back to the previous Skull. Walking around the shaft will cause a ![]() Malicious Face to appear to block the player. Heading through the other door will then return back into the start of the Blue Path.
Malicious Face to appear to block the player. Heading through the other door will then return back into the start of the Blue Path.
Red Skull Path
Taking the left path within the starting room of 1-3 will lead to an outdoor courtyard scattered with stone paths and walkways. Walking into the room and triggering the enemies will spawn in a wave of 8 ![]() Strays on the platforms and 2
Strays on the platforms and 2 ![]() Streetcleaners on the floor. Killing the Strays will then spawn in 4
Streetcleaners on the floor. Killing the Strays will then spawn in 4 ![]() Schisms, and killing the Streetcleaners will spawn in 5
Schisms, and killing the Streetcleaners will spawn in 5 ![]() Drones. Killing either group of enemies will cause a
Drones. Killing either group of enemies will cause a ![]() Cerberus located on the middle stone platform to awake.
Cerberus located on the middle stone platform to awake.
Afterwards, the player enters into a maze of winding stone staircases and ramps, situated over a large pool of lava. Entering into the arena will spawn 4 ![]() Strays and 2
Strays and 2 ![]() Schisms on the lower sections of the stairway. Killing the Strays will activate 2
Schisms on the lower sections of the stairway. Killing the Strays will activate 2 ![]() Streetcleaners to appear and killing the Schisms will spawn 4
Streetcleaners to appear and killing the Schisms will spawn 4 ![]() Drones at the top floor. Killing both sets of machines will spawn in 2
Drones at the top floor. Killing both sets of machines will spawn in 2 ![]() Malicious Faces for both groups, with the Drones summoning a Malicious Face on the left of the entrance and the Streetcleaners summoning one to the right.
Malicious Faces for both groups, with the Drones summoning a Malicious Face on the left of the entrance and the Streetcleaners summoning one to the right.
The room afterwards houses the final arena for the Red Skull Path: a large interior room scattered with various broken up stairways, leading to the Red Skull Key to the east of the entrance. Heading into the room will spawn in a wave of 8 ![]() Filth, 2
Filth, 2 ![]() Drones, and 2
Drones, and 2 ![]() Streetcleaners to spawn around the section nearby the entrance. Killing the wave will then spawn in a
Streetcleaners to spawn around the section nearby the entrance. Killing the wave will then spawn in a ![]() Malicious Face and 6
Malicious Face and 6 ![]() Strays.
Strays.
Heading up to the Red Skull will then spawn in 6 ![]() Strays and a
Strays and a ![]() Schism on the path to block the player. Approaching the pedestal will then cause 3
Schism on the path to block the player. Approaching the pedestal will then cause 3 ![]() Streetcleaners to break in through a crack within the wall, along with causing a
Streetcleaners to break in through a crack within the wall, along with causing a ![]() Cerberus to awaken.
Cerberus to awaken.
Grabbing the Red Skull and entering into the small pocket left by the Streetcleaners will lead to a narrow chute for the player to drop down into, leading down through the shaft found within the Blue Skull path with the ![]() Malicious Face and dropping into the room with the Blue Skull itself, along with collecting a
Malicious Face and dropping into the room with the Blue Skull itself, along with collecting a ![]() Blood Orb in the process. The player can then either head through the Blue Path as normal or skip it by jumping out of the chute and into the room nearby to reach the Split Door faster.
Blood Orb in the process. The player can then either head through the Blue Path as normal or skip it by jumping out of the chute and into the room nearby to reach the Split Door faster.
Boss Encounter
For more detail on the boss enemy, see Hideous Mass.
After collecting one of the Skulls from either pathway and placing it onto the respective pedestal, the split door at the starting room will open to a stone corridor housing a Terminal at the end of the hallway. Heading through the door nearby leads to a large domed courtyard. In the center of the room lies two stone boulders engraved with the Creation of Adam, however approaching it will then cause the carvings to break out from the ground and reveal them to be the arms of the ![]() Hideous Mass, which then digs itself out to fight the player.
Hideous Mass, which then digs itself out to fight the player.
The ![]() Hideous Mass is a massive stationary Demon which forces the player to be mobile and dodge it's large area of effect moves. The
Hideous Mass is a massive stationary Demon which forces the player to be mobile and dodge it's large area of effect moves. The ![]() Hideous Mass is equipped with stone plating and armor all around it's body, which is invulnerable to all attacks and reflects off explosives and hitscans. This armor is separated by its inner fleshy mass which is vulnerable, with it's main exposed regions being the chest and the tail.
Hideous Mass is equipped with stone plating and armor all around it's body, which is invulnerable to all attacks and reflects off explosives and hitscans. This armor is separated by its inner fleshy mass which is vulnerable, with it's main exposed regions being the chest and the tail.
The ![]() Hideous Mass will cycle between different forms depending on it's attacks, with an upright form as it's default pose, and a lowered form with it's tail up and belly hidden. During it's upright form, it will send out a volley of Hell Mortars, which arc upwards and then homes in on the player with limited tracking, exploding on contact. The mortars can be parried but not deflected with explosions. After sending out it's mortars, the
Hideous Mass will cycle between different forms depending on it's attacks, with an upright form as it's default pose, and a lowered form with it's tail up and belly hidden. During it's upright form, it will send out a volley of Hell Mortars, which arc upwards and then homes in on the player with limited tracking, exploding on contact. The mortars can be parried but not deflected with explosions. After sending out it's mortars, the ![]() Hideous Mass will then perform a ground slam to change into it's lowered position, resulting in a horizontal shockwave across the ground. During it's lowered phase, it will either perform a clap that creates a fast vertical shockwave for the player to dodge, or raise it's tail to fire a harpoon. Getting hit by the harpoon will slow down the player significantly, making it almost impossible to dodge the rest of it's attacks until broken. This can be done by either shooting the tail or punching the harpoon, with the
Hideous Mass will then perform a ground slam to change into it's lowered position, resulting in a horizontal shockwave across the ground. During it's lowered phase, it will either perform a clap that creates a fast vertical shockwave for the player to dodge, or raise it's tail to fire a harpoon. Getting hit by the harpoon will slow down the player significantly, making it almost impossible to dodge the rest of it's attacks until broken. This can be done by either shooting the tail or punching the harpoon, with the ![]() Knuckleblaster being able to break it with one hit. The harpoon can also be parried, however with incredibly strict timing.
Knuckleblaster being able to break it with one hit. The harpoon can also be parried, however with incredibly strict timing.
Once the ![]() Hideous Mass has reached to 20% of its healthbar it will Enrage, flipping over to reveal its chest weakpoint and tail while continually firing a barrage of Mortars at the player.
Hideous Mass has reached to 20% of its healthbar it will Enrage, flipping over to reveal its chest weakpoint and tail while continually firing a barrage of Mortars at the player.
Weapons such as the ![]() Shotguns and
Shotguns and ![]() Nailguns are excellent for damage, with the
Nailguns are excellent for damage, with the ![]() Attractor Nailgun's magnet allowing the player to hit it's weakpoints consistently, with the best magnet spot for the Nailgun being on the tail. Shotgun Swapping paired with the
Attractor Nailgun's magnet allowing the player to hit it's weakpoints consistently, with the best magnet spot for the Nailgun being on the tail. Shotgun Swapping paired with the ![]() Knuckleblaster is good when the
Knuckleblaster is good when the ![]() Hideous Mass is in it's upright phase, as both the chest and tail are easy to reach. If equipped with the
Hideous Mass is in it's upright phase, as both the chest and tail are easy to reach. If equipped with the ![]() Electric Railcannon, utilizing Railcoining can deal extreme amounts of damage to the
Electric Railcannon, utilizing Railcoining can deal extreme amounts of damage to the ![]() Hideous Mass when upright. The
Hideous Mass when upright. The ![]() Sawblade Launchers can also be used for extreme damage, as placing a magnet using the Attractor variant on it's chest and then dumping in saws will cause the tail to be hit once it lowers down to fire a Mortar Strike.
Sawblade Launchers can also be used for extreme damage, as placing a magnet using the Attractor variant on it's chest and then dumping in saws will cause the tail to be hit once it lowers down to fire a Mortar Strike.
Killing the Hideous Mass will then open the elevator and unlock the end of the level.
Challenge
For this level's challenge, the player needs to explore both the Blue Path and Red Path to collect both of the Skulls and place it onto both pedestals, opening a path to a hidden arena where the player will then fight the special ![]() Swordsmachines;
Swordsmachines; ![]() Agony and
Agony and ![]() Tundra.
Tundra.
Agony and Tundra both possess 50 HP, and each have special behaviors. Tundra will constantly act as a Swordsmachine in its second phase and Agony behaves as if it was always Enraged. Agony receives 75% more damage from electrical sources, such as the ![]() Electric Railcannon and its other variants, and Tundra receives 75% more damage from explosions. When one is brought down to 0, it will slowly gain back its health until it is at the same level as the other one when it first started healing. Beating both of them fulfils the challenge's requirement and allows access to the third slab
Electric Railcannon and its other variants, and Tundra receives 75% more damage from explosions. When one is brought down to 0, it will slowly gain back its health until it is at the same level as the other one when it first started healing. Beating both of them fulfils the challenge's requirement and allows access to the third slab ![]() to unlock the
to unlock the ![]() Alternate Revolvers.
Alternate Revolvers.
Secrets
| #1 | 
| |
| #2 | 
| |
| #3 | 
| |
| #4 | 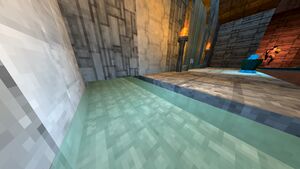 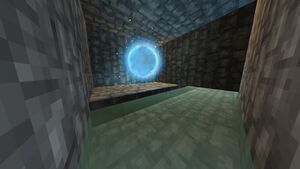
| |
| #5 | 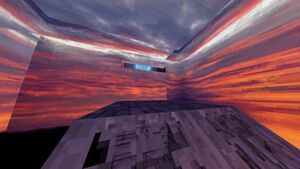
|
Trivia
- This level contains the most
 Strays out of any level, at a massive 35. Usually, a level will place increased numbers of a new enemy to get the player familiar with fighting them. However, Strays have already been introduced earlier in the level 0-1, making this a notable occurrence.
