| SWORDSMACHINE | |||||
|---|---|---|---|---|---|

| |||||
| General | |||||
| Class | Greater Machine | ||||
| Health | 50 (Phase 1) 75 (Phase 2) | ||||
| Weight | Heavy (Grounded) | ||||
| Rank | 3 | ||||
Head (2x)
|
✗ | ||||
Limb (1.5x)
|
✗ | ||||
| Conditional Modifiers | |||||
Flammable?
|
|||||
Airshot?
|
|||||
| Damage Type Modifiers | |||||
| - Shotgun Parries: 225% - Shotgun Pellets: 150% | |||||
| Radiance Multipliers | |||||
| Health | 1.5x | ||||
| Damage | 1.5x | ||||
| Speed | 1.25x | ||||
| Appearances | |||||
| 0-2, 0-3 | |||||
Swordsmachine
Jump to navigation
Jump to search
| SWORDSMACHINE | |||||
|---|---|---|---|---|---|
|
| |||||
| General | |||||
| Class | Greater Machine | ||||
| Health | 15 (Phase 1) 15 (Phase 2) | ||||
| Weight | Heavy (Grounded) | ||||
| Rank | 3 | ||||
Head (2x)
|
✗ | ||||
Limb (1.5x)
|
✗ | ||||
| Conditional Modifiers | |||||
Flammable?
|
|||||
Airshot?
|
|||||
| Damage Type Modifiers | |||||
| - Shotgun Parries: 225% - Shotgun Pellets: 150% | |||||
| Radiance Multipliers | |||||
| Health | 2x | ||||
| Damage | 1.5x | ||||
| Speed | 1.25x | ||||
| Appearances | |||||
| 6-1
| |||||
| Cyber Grind Data | |||||
| Wave | Cost | Spawns | |||
| 9 | 20 + 1 | n | |||
| SWORDSMACHINE "AGONY" | |||||
|---|---|---|---|---|---|

| |||||
| General | |||||
| Class | Greater Machine | ||||
| Health | 50 | ||||
| Weight | Heavy (Grounded) | ||||
| Rank | 3 | ||||
Head (2x)
|
✗ | ||||
Limb (1.5x)
|
✗ | ||||
| Conditional Modifiers | |||||
Flammable?
|
|||||
Airshot?
|
|||||
| Damage Type Modifiers | |||||
| - Shotgun Parries: 225% - Electricity: 175% - Shotgun Pellets: 150% | |||||
| Radiance Multipliers | |||||
| Health | 2x | ||||
| Damage | 1.5x | ||||
| Speed | 1.25x | ||||
| Appearances | |||||
| 1-3 | |||||
| SWORDSMACHINE "TUNDRA" | |||||
|---|---|---|---|---|---|

| |||||
| General | |||||
| Class | Greater Machine | ||||
| Health | 50 | ||||
| Weight | Heavy (Grounded) | ||||
| Rank | 3 | ||||
Head (2x)
|
✗ | ||||
Limb (1.5x)
|
✗ | ||||
| Conditional Modifiers | |||||
Flammable?
|
|||||
Airshot?
|
|||||
| Damage Type Modifiers | |||||
| - Shotgun Parries: 225% - Explosions: 175% - Shotgun Pellets: 150% | |||||
| Radiance Multipliers | |||||
| Health | 2x | ||||
| Damage | 1.5x | ||||
| Speed | 1.25x | ||||
| Appearances | |||||
| 1-3 | |||||
The Swordsmachine is the first Machine other than the player character encountered in ULTRAKILL. It first appears in 0-2, killing Husks in its own series of arenas parallel to the player's progression, then serves as the boss fight of 0-3. Copycat scrapheads imitating the Swordsmachine begin appearing as common enemies in 6-1.
Swordsmachine and its copycats are lanky, yellow-and-black machines with irregular, asymmetrical features, having repeatedly rebuilt themselves with scavenged scrap in the wake of mankind's demise. Per its name, its main weapon is a motorized sword it wields in its left hand, though it also has a Core Eject Shotgun attached to its right arm for longer-range pressure.
Behavior
The Swordsmachine will chase after the player and use attacks with its sword or shotgun, depending on the distance between it and the player.
When its first health bar is depleted, or when its copycats drop to 50% health, they will fall to one knee for a short period of time, losing their right arm and shotgun but gaining the Sword Throw and Sword Spiral attacks.
If any of its sword attacks are parried, it will fall to one knee for a moment and vocalize, becoming Enraged for a short while. Parrying either sword throw will stun it for longer, and parrying its shotgun will not stun or Enrage it at all.
While Enraged, the Swordsmachine gains increased movement and attack speed, but loses every attack except for its Combo and Running Swing.
If it is parried again while already Enraged, it will stay Enraged for a longer period of time.
Enraged Swordsmachines will not stop themselves from jumping off ledges while performing attacks.
If any unblessed ![]() Stalkers are present, Swordsmachines will prioritize killing them first to become Sanded, unless they are already sandified.
Stalkers are present, Swordsmachines will prioritize killing them first to become Sanded, unless they are already sandified.
The Swordsmachines that spawn in the first half of 6-1 have self-illumination on their models disabled, leaving only the emissive blue glow on their heads and torsos and any lights cast from the environment.
Attacks
Shotgun Blast
This attack only happens when the Swordsmachine has more than 50% health. If the player is too far away from the Swordsmachine, it will fire a shotgun spread of 12 projectiles in the direction it is looking at.
Each shotgun pellet does 25 damage, and can be parried back to the Swordsmachine.
If the player enters melee range while they are readying this attack, the Swordsmachine is able to cancel into its Running Swing or Sword Combo attacks.
Running Swing
The Swordsmachine will jump at the player and swing its sword in a wide horizontal arc, dealing 40 damage. This attack can be parried.
Sword Combo
The Swordsmachine will brandish its sword to the side, then swing at the player three times, dealing 25 damage per hit.
Each swing can be parried.
Sword Throw
The Swordsmachine will rear back its sword under its shoulder, then throw it at the player's predicted location, spinning vertically and dealing 30 damage on contact.
When it contacts a wall, it will spin in place until it returns to the Swordsmachine, keeping its damaging hitbox for the entire duration of its flight.
The sword can be parried at any point during its travel, returning it to the Swordsmachine and dealing 20 damage, as well as stunning it for longer than its melee parries. A parried sword throw that would be lethal to the Swordsmachine will instead leave it with 0.1 health, allowing the player to finish it off however they please. This attack's startup can also be parried with melee, but due to the speed of the animation and the minimum distance at which it will trigger, the parry must be prepared for well in advance at higher difficulties.
Sword Spiral
The Swordsmachine will bring its sword vertically in front of it, then throw it in a horizontal spiral around itself. The sword deals 30 damage on contact.
This attack can be melee parried during its startup. The thrown sword can also be parried, returning it to the Swordsmachine and dealing 20 damage, and has enough space under it for a sliding player to pass through unharmed. Like with the Sword Throw, parrying the sword projectile cannot kill the Swordsmachine, though it will be left at 0.1 health and stunned for a prolonged period, rendering it easily dispatched.
Strategy
Swordsmachines are easy to dance around in isolation, though in greater numbers and in concert with other enemies they are highly dangerous, harassing airborne and far away players with ranged attacks and slicing careless players to ribbons within moments.
Parrying their attacks with the ![]() Feedbacker and especially with a point-blank
Feedbacker and especially with a point-blank ![]() Shotgun blast is extremely effective, as it not only provides a full heal and stamina recharge, but it will also allow for a combo opportunity on a Swordsmachine that can kill or heavily damage it. The Shotgun's blast can also be projectile boosted to deal damage to a Swordsmachine from a distance, and combining projectile boosts with
Shotgun blast is extremely effective, as it not only provides a full heal and stamina recharge, but it will also allow for a combo opportunity on a Swordsmachine that can kill or heavily damage it. The Shotgun's blast can also be projectile boosted to deal damage to a Swordsmachine from a distance, and combining projectile boosts with ![]() Rockets is the most reliable long-range damage combo.
Rockets is the most reliable long-range damage combo.
The ![]() Electric Railcannon, the
Electric Railcannon, the ![]() Alternate Piercer and the
Alternate Piercer and the ![]() Sharpshooter can all be used in combination with the
Sharpshooter can all be used in combination with the ![]() Marksman Revolver's Coins to deal heavy damage to one, or multiple Swordsmachines if lined up properly. Experienced players can attempt to set up a Railcoin for heavy damage.
Marksman Revolver's Coins to deal heavy damage to one, or multiple Swordsmachines if lined up properly. Experienced players can attempt to set up a Railcoin for heavy damage.
Both the ![]() Sawblade Launcher and the
Sawblade Launcher and the ![]() Nailgun can be used to make traps that can cull groups of Swordsmachines very quickly and efficiently. The
Nailgun can be used to make traps that can cull groups of Swordsmachines very quickly and efficiently. The ![]() Pump Shotgun's Overpump explosion and the
Pump Shotgun's Overpump explosion and the ![]() Malicious Railcannon can be used for exploding groups of Swordsmachines due to their high damage, decent range and speed at which they can be performed.
Malicious Railcannon can be used for exploding groups of Swordsmachines due to their high damage, decent range and speed at which they can be performed.
Dodging a Swordsmachine that still has its shotgun is pretty trivial, as, despite their fast running speed they can be circle strafed and dodged very easily. However, a Swordsmachine that's lost its shotgun and has gained more attacks is extremely lethal and should be taken out with as fast as possible due to their high damaging and fast Sword Throw.
Difficulty Changes
Brutal
- Staggered for significantly less time when changing phases or after Enraging.
- Can rotate towards the player while shooting its
 Shotgun to accurately aim.
 - Can punch the player using the same attack patterns as it does with its sword after throwing it. Each punch does 10 damage to the player.
Terminal Entry
TYPE: GREATER MACHINE
DATA:
Its original form is unrecognisable[sic] after years of scavenging scrap and rebuilding itself, but among scrapheads, the Swordsmachine is quite famous due to its combat prowess and selfmade form, ugly to most but beautiful to enthusiasts, spawning many copycats.
It wields a selfmade sword with a motor on it that, when revved, will heat the blade, cutting through most organic matter with ease.
Due to its possessive hoarding behavior, it's one of the few machines still capable of vocalization -- an ability most have discarded for more efficient resource management.
STRATEGY:
- Despite its excellent performance against Hell's denizens, its design does not take into account extremely mobile opponents, so the best way to avoid its blade is to jump out of its vertical range.
- Its motorized sword makes for predictable attacks, making the Swordsmachine an excellent target for parrying.
Media
Swordsmachine firing its shotgun in phase 1.

Swordsmachine throwing its sword in phase 2.

Swordsmachine performing a combo

Swordsmachine performing a running swing.

Swordsmachine producing a spiral with its sword.
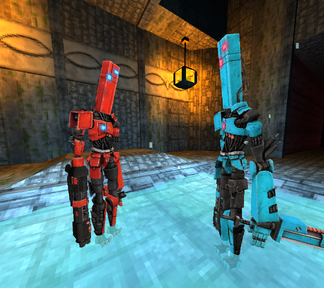
Swordsmachines Agony and Tundra in 1-3.


Spawn
Ambience
Running Swing, Combo
Sword Throw, Sword Spiral
Damage
Knockdown
Death
Trivia
- The Swordsmachine was the first enemy for ULTRAKILL to have been based off concept art by BigRockBMP.
- Microsoft TTS is used for the Swordsmachine's voice. Which is heard when it takes damage, becomes enraged, falters or is killed.
- The sound it makes when it is killed is re-used for the
 Streetcleaner.
- The sound it makes when it is killed is re-used for the
- The secret encounter with the Swordsmachines "Agony" and "Tundra" are a reference to the boss battle against Agni and Rudra from Devil May Cry 3 which use identical attacks to one another and are colored red and blue respectively.
- This reference can be seen again in 6-1 against the two
 Sisyphean Insurrectionists "Angry" and "Rude".
- This reference can be seen again in 6-1 against the two
- The Swordsmachines encountered after defeating the first one in 0-3 are considered copycats of the original.
- Even without the "Monsters Attack Eachother" cheat enabled, the Swordsmachine is the only enemy with an AI property to actively seek out and kill Stalkers before engaging any other desirable target.