2-1: Bridgeburner
| 2-1: BRIDGEBURNER | |||
|---|---|---|---|
| |||
| General | |||
| Layer & Part | LUST /// FIRST | ||
| Challenge | Don't open any normal doors. | ||
| Music | Cold Winds | ||
| Tip of the Day | |||
Enemies scream when falling from a fatal height.
| |||
| Collectables | |||
| Enemies | |||
| Rank Requirements | |||
| Rank | Time | Kills | Style |
| S | 03:30 | 69 | 11,000 |
| A | 04:00 | 60 | 10,000 |
| B | 05:00 | 45 | 7,500 |
| C | 08:00 | 20 | 3,500 |
2-1: BRIDGEBURNER is the first level of Lust. It serves as the ideal testing ground for the ![]() Knuckleblaster, as well as the debut of bounce pads and as the tutorial for Dash Jumping. The song used in this level is Cold Winds.
Knuckleblaster, as well as the debut of bounce pads and as the tutorial for Dash Jumping. The song used in this level is Cold Winds.
Level
Start
The start of 2-1 is a set of dimly lit tunnels, each with sizeable pools of water in the middle. At the end of the first hall, to the right there is a small slope that leads to the next hallway leading to the first arena, which has defunct lighting and support beams.
Approaching the door will trigger a prompt introducing how the Knuckleblaster functions:
First Tower
Walking through the door leads to the interior of a tall, vertical tower, consisting of metal cubes and platforms, several lantern poles, and a bottomless pit.
Jumping on the lowest platform will start an encounter with 1 ![]() Schism on the first platform and 2
Schism on the first platform and 2 ![]() Strays on the platform next to it. The player can use their recently gained knowledge to forcefully shove the enemies into the abyss below.
Strays on the platform next to it. The player can use their recently gained knowledge to forcefully shove the enemies into the abyss below.
Jumping on the platform with the Strays and wall-jumping up will lead above to another platform, initiating an encounter with 2![]() Drones.
Drones.
To the right of this small platform is a small strip of steel. Wall-jumping on it will lead to a platform covered with several arches, which contains 3 Strays.
Afterwards leads to the final platform of the tower, starting a fight against 4 Schisms. Behind the door is the first bounce pad, which will launch the player into the next section of the level after stepped on.
Broken Bridge
After being launched by the bounce pad, the player is sent to the outside of the tower; a large set of walkways, bridges, and platforms, situated over a spanning cityscape.
The second platform features 4 breakable glass panes in the middle. Walking forward will trigger an encounter with 2![]() Streetcleaners and 4 Strays. Upon their demise, 5
Streetcleaners and 4 Strays. Upon their demise, 5![]() Filth, 3 Schisms and 3 Drones will spawn.
Filth, 3 Schisms and 3 Drones will spawn.
The third section of the bridge has 2 sets of walkways with the middle of the top walkway breaking after stepping onto the broken section. Falling through the bridge will start and encounter with 8 Filth, 4 Schisms and a single Streetcleaner. A ![]() Cerberus is situated at the far end of the bridge, awaking once the weak platform is broken or approaching close to it. At the end of the third part of the bridge is a platform with a checkpoint.
Cerberus is situated at the far end of the bridge, awaking once the weak platform is broken or approaching close to it. At the end of the third part of the bridge is a platform with a checkpoint.
Approaching the end of the third part will prompt another popup, which is a tutorial on how to Dash Jump:
With this newfound knowledge, the player can then launch themselves to the entrance to the tower, with various bounce pads below in case of the player missing the jump.
Second Tower
The final part of the bridge leads directly into the tower, consisting of several broken platforms and bounce pads.
Continue forward, and 2 Drones and 2 Strays will be summoned on the heightened platform. There is a bounce pad between two walls, leading to the higher platform, spawning 8 Filth to assault the player. Taking any of the two bounce pads will lead to a platform with another bounce pad and a singular Stray. Using that bounce pad on the end of the platform will send towards a higher platform, where 2 Schisms and 2 Drones will spawn in front of the player.
Wall-jumping up to the other platform will connect to a long series of bounce pads, which fling the player to a thin platform, summoning an ambush consisting of 2 Streetcleaners and 4 Filth.
Wall jumping onto a platform will spawn a set of 2 Drones and a ![]() Malicious Face by the final set of walkways, leading to the end of the level.
Malicious Face by the final set of walkways, leading to the end of the level.
End
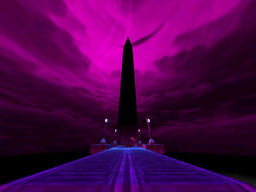
After the tall drop from the tower lies a thin series of bridges, leading to the end of the level, where the player can predominantly see the ![]() Corpse of King Minos looming in the background; with spotlight eyes scanning the city.
Corpse of King Minos looming in the background; with spotlight eyes scanning the city.
Challenge
For this level's challenge, using high-mobility tools such as the ![]() Freezeframe Rocket Launcher is highly recommended. The player needs to break a cracked wall in the first room, leading to a small platform to the outside. The player can then skip to the outdoor bridge section, removing the need to open the doors from the first tower. When arriving to the tutorial for the dash jump, the player can go around the tower with explosions or Rocket Riding and end the level by going into the exit. More experienced players can also use techniques such as an Ultraboost to achieve this and sometimes even go straight to the end without stopping between each tower.
Freezeframe Rocket Launcher is highly recommended. The player needs to break a cracked wall in the first room, leading to a small platform to the outside. The player can then skip to the outdoor bridge section, removing the need to open the doors from the first tower. When arriving to the tutorial for the dash jump, the player can go around the tower with explosions or Rocket Riding and end the level by going into the exit. More experienced players can also use techniques such as an Ultraboost to achieve this and sometimes even go straight to the end without stopping between each tower.
Secrets
| #1 | 
| |
| #2 | 
| |
| #3 | 
| |
| #4 | 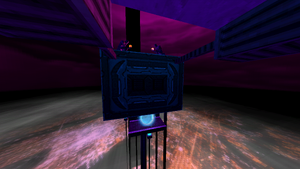
| |
| #5 | 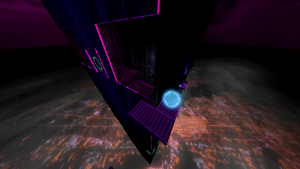
|
Trivia
- Originally, the level's name was going to be "In the Air Tonight". Its thumbnail is referred to as such in the game's files.
- The title of the level is a reference to "Bridgeburner" from the album Bleeder by Mutoid Man.
- The cityscape below the level and all other visible cityscapes in Lust is a pixelated view of New York City at night.


