1-2: The Burning World
| 1-2: THE BURNING WORLD | |||
|---|---|---|---|
| |||
| General | |||
| Layer & Part | LIMBO /// SECOND | ||
| Challenge | Do not pick up any skulls | ||
| Music | A Thousand Greetings A Complete and Utter Destruction of the Senses | ||
| Tip of the Day | |||
Use the ATTRACTOR NAILGUN's magnets to form concentrated orbs of nails that can be moved around using the pull force of other magnets.
| |||
| Collectables | |||
| Enemies | |||
| Rank Requirements | |||
| Rank | Time | Kills | Style |
| S | 04:40 | 62 | 7,000 |
| A | 05:00 | 55 | 6,000 |
| B | 06:00 | 40 | 4,500 |
| C | 08:20 | 30 | 1,500 |
1-2: THE BURNING WORLD is the second level of Limbo, which introduces the ![]() Streetcleaner, Unparriable Attacks, and the first instance of
Streetcleaner, Unparriable Attacks, and the first instance of ![]() Cerberus as a common enemy. 1-2 also houses an encounter with two secret bosses:
Cerberus as a common enemy. 1-2 also houses an encounter with two secret bosses: ![]() Cancerous Rodent and
Cancerous Rodent and ![]() Very Cancerous Rodent. The songs used are A Thousand Greetings for the start and A Complete and Utter Destruction of the Senses once it reaches to the midpoint of the level.
Very Cancerous Rodent. The songs used are A Thousand Greetings for the start and A Complete and Utter Destruction of the Senses once it reaches to the midpoint of the level.
Level
Start
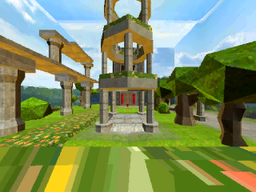
Starting off the level, the player enters into a large, open room featuring a prominent circular stone tower in the middle of the room. A stone wall lies at the far end of the arena housing a high balcony leading to a door, along with a locked door and a Red Pedestal on the lower floor. A Blue Pedestal is also situated to the left of the entrance.
Entering into the arena will spawn a large wave of 12 ![]() Filth, 4
Filth, 4 ![]() Strays, and 1
Strays, and 1 ![]() Schism. Climbing up the stone platforms by the left side of the arena will spawn in 3
Schism. Climbing up the stone platforms by the left side of the arena will spawn in 3 ![]() Strays onto the tower, and climbing up onto the stone gazebo that covers the entrance will spawn another group of 3
Strays onto the tower, and climbing up onto the stone gazebo that covers the entrance will spawn another group of 3 ![]() Strays.
Strays.
Upper Castle
Jumping up to the top balcony in the first room leads to a interior hallway, with one main corridor connected by 2 smaller paths to either side. Walking forward will spawn in a set of 12 ![]() Filth, with 2
Filth, with 2 ![]() Drones and 4
Drones and 4 ![]() Schisms spawning after the Filth are killed.
Schisms spawning after the Filth are killed.
Afterwards, the player then enters into a small room with a set of stairs leading up to a Blue Skull Key and a locked door. Approaching the Skull Key will cause a wave of 4 ![]() Filth, 3
Filth, 3 ![]() Drones, and a
Drones, and a ![]() Stray to spawn in by the nearby stairs.
Stray to spawn in by the nearby stairs.
Picking up the Skull Key will then unlock the door nearby, leading into a hallway with a pile of flaming corpses, acting as a sudden shock with the music cutting out once the player encounters the burning bodies.
The Burning World
The path forward then leads back into the first room of stone corridors through a hole in the side of the wall. Exiting back out to the outdoor region of the level will reveal it now torched ablaze with fires engulfing the foliage and stone buildings and an orange hazy glow filling the skybox.
Dropping down from the balcony will cause the player to encounter an introduction to the ![]() Streetcleaners: nimble, humanoid machines that spot-dodge attacks, reflect projectiles, have a resistance to explosives and have a tendency to burn anything within their sight with their flamethrowers. Two
Streetcleaners: nimble, humanoid machines that spot-dodge attacks, reflect projectiles, have a resistance to explosives and have a tendency to burn anything within their sight with their flamethrowers. Two ![]() Streetcleaners will exit from the starting elevator to fight the player.
Streetcleaners will exit from the starting elevator to fight the player.
With the Blue Skull Key in hand, placing it onto the pedestal nearby the entrance will unlock a door into a separate room with a stone courtyard, housing a Red Skull Key at the far end of the room. Proceeding towards the skull will trigger a prompt on unparriable attacks, relating the ![]() Streetcleaner's unparriable flamethrower. 3
Streetcleaner's unparriable flamethrower. 3 ![]() Streetcleaners will break out of the walls of the arena to jump the player as they attempt to pick up the Skull Key.
Streetcleaners will break out of the walls of the arena to jump the player as they attempt to pick up the Skull Key.
Returning back with the Red Skull to the Red Pedestal by the stone wall will allow the player to unlock the doors.
Lower Castle
Entering inside leads to a large stone room with a shallow pool of water, with the path forward housing an inactive ![]() Cerberus statue in front of the door, and a door to the right leading to an optional secret.
Cerberus statue in front of the door, and a door to the right leading to an optional secret.
Heading through the forward door then leads into the final arena housing the Exit Elevator. Inside lies a small room with a set of stone platforms placed by the side walls. Proceeding forward will then cause a wave of 2 ![]() Streetcleaners and 6
Streetcleaners and 6 ![]() Strays to spawn in, with the Streetcleaners emerging from a set of pillars in front of the player and the Strays spawning above on the platforms. Killing the Streetcleaners will spawn in 2 more
Strays to spawn in, with the Streetcleaners emerging from a set of pillars in front of the player and the Strays spawning above on the platforms. Killing the Streetcleaners will spawn in 2 more ![]() Streetcleaners along with 2
Streetcleaners along with 2 ![]() Drones. Defeating all the enemies will cause the exit gate to open and unlock the end of the level.
Drones. Defeating all the enemies will cause the exit gate to open and unlock the end of the level.
Challenge
For this level's challenge, the player is required to possess the ![]() Electric Railcannon or
Electric Railcannon or ![]() Jumpstart Nailgun. The player then must use either of the weapons to activate a shortcut found within the Upper Castle, which can be found by heading underneath a set of stairs in the room with the Blue Skull. Heading through a short tunnel will lead into a small compartment housing a
Jumpstart Nailgun. The player then must use either of the weapons to activate a shortcut found within the Upper Castle, which can be found by heading underneath a set of stairs in the room with the Blue Skull. Heading through a short tunnel will lead into a small compartment housing a ![]() Soul Orb and a set of electrical coils. Firing the
Soul Orb and a set of electrical coils. Firing the ![]() Electric Railcannon or
Electric Railcannon or ![]() Jumpstart Nailgun cable at them will then cause them to activate, opening a hatch which drops the player into the room before the final arena, skipping the need to collect the Blue and Red Skull Keys. The player then only has to complete the level as usual from this point.
Jumpstart Nailgun cable at them will then cause them to activate, opening a hatch which drops the player into the room before the final arena, skipping the need to collect the Blue and Red Skull Keys. The player then only has to complete the level as usual from this point.
Secrets
| #1 | 
| |
| #2 | 
| |
| #3 | 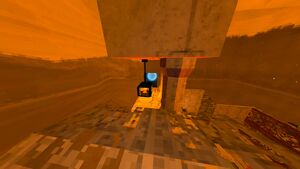
| |
| #4 | 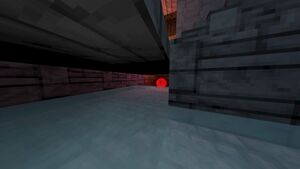
| |
| #5 | 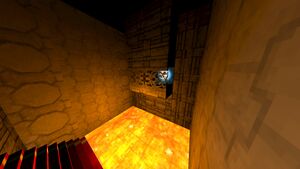
|
Secret Boss Encounter
Found within the small room housing the pool of lava inside the Lower Castle region lies a small cracked piece of the wall, situated to the left of the doorway. The player can destroy it with an explosive in order to access a hidden area outside the prior room.
Inside lies a lar empty room filled with a shallow pool of water around the floor. Heading around the tunnel created by the corridor reveals a hidden compartment to the right of the player, blocked off with a barrier. Continuing past the opening leads to a large crack in the wall, which the player can break with another explosive, leading to a set of stone hallways and corridors.
Moving through the hallways will eventually lead the player to a door at the end of the hallway, bathed in green light. Approaching near the door will cause it to suddenly break apart, revealing the ![]() Cancerous Rodent.
Cancerous Rodent.
The ![]() Cancerous Rodent is a glowing collection of roughly 15 polygons vaguely arranged in the shape of a mouse, which slowly moves towards the player. The
Cancerous Rodent is a glowing collection of roughly 15 polygons vaguely arranged in the shape of a mouse, which slowly moves towards the player. The ![]() Cancerous Rodent has no other attacks at all, and hitting it once will immediately kill it.
Cancerous Rodent has no other attacks at all, and hitting it once will immediately kill it.
After the player unceremoniously kills the ![]() Cancerous Rodent and returns back to the hallway, the player will then encounter the
Cancerous Rodent and returns back to the hallway, the player will then encounter the ![]() Very Cancerous Rodent standing outside of the opening. The
Very Cancerous Rodent standing outside of the opening. The ![]() Very Cancerous Rodent is a much larger version of the
Very Cancerous Rodent is a much larger version of the ![]() Cancerous Rodent, which sends out a small burst of small homing
Cancerous Rodent, which sends out a small burst of small homing ![]() Hell Seekers at the player, which explodes on contact. While now posing a threat, the
Hell Seekers at the player, which explodes on contact. While now posing a threat, the ![]() Very Cancerous Rodent is quite easy to deal with, as it's only attack is slow and easy to dodge, and it will also occasionally damage itself with the explosion. Any weapon can be used to kill it effectively, with
Very Cancerous Rodent is quite easy to deal with, as it's only attack is slow and easy to dodge, and it will also occasionally damage itself with the explosion. Any weapon can be used to kill it effectively, with ![]() Sawblade Traps,
Sawblade Traps, ![]() Shotgun Swapping, and Ground Slamming being able to deal significant damage quickly.
Shotgun Swapping, and Ground Slamming being able to deal significant damage quickly.
Slab II
Killing the ![]() Very Cancerous Rodent will then unlock a compartment nearby the opening, housing the second
Very Cancerous Rodent will then unlock a compartment nearby the opening, housing the second ![]() Slab required to unlock the
Slab required to unlock the ![]() Alternate Revolver.
Alternate Revolver.
Hidden through each of the levels in Limbo lies a set of stone slab buttons, which are revealed after finding hidden secrets or completing optional challenges. Collecting all four slabs grants the player an unlockable variant to their ![]() Revolver in 1-4: Clair de Lune, the
Revolver in 1-4: Clair de Lune, the ![]() Alternate Revolver or the "Slab" Revolver.
Alternate Revolver or the "Slab" Revolver.
Pressing the Slab will cause it to light up and activate, before a prompt then appears below:
motion.
Trivia
- The title of the level is a reference to The Burning World by Swans.
- The models used for the burning bodies is identical to the old models of the Strays and Schisms.
