0-3: Double Down
| 0-3: DOUBLE DOWN | |||
|---|---|---|---|

| |||
| General | |||
| Layer & Part | PRELUDE /// THIRD | ||
| Challenge | Kill only 1 enemy | ||
| Music | Into the Fire | ||
| Tip of the Day | |||
Dash: Fully invincible, costs stamina
Slide: Greater distance, no invincibility | |||
| Collectables | |||
| Enemies | |||
| Rank Requirements | |||
| Rank | Time | Kills | Style |
| S | 03:30 | 49 | 7,000 |
| A | 05:00 | 45 | 5,000 |
| B | 10:00 | 25 | 3,000 |
| C | 15:00 | 10 | 1,000 |
0-3: DOUBLE DOWN is the third level of Prelude, introducing the ![]() Schism and the
Schism and the ![]() Core Eject Shotgun, along with starring the
Core Eject Shotgun, along with starring the ![]() Swordsmachine as the main boss encounter. The song used in this level is Into the Fire.
Swordsmachine as the main boss encounter. The song used in this level is Into the Fire.
Level
Start
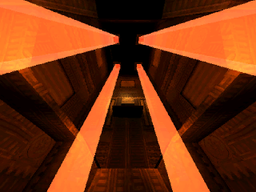
Starting off the level, the player enters a tall darkened room with a glass ceiling, with ramps and balconies leading to a gap between the door on the other side. Entering into the room will cause four orange pillars of light to activate, lighting up the room. Walking up the ramp will cause 4 ![]() Filth and 2
Filth and 2 ![]() Strays to spawn in.
Strays to spawn in.
Entering into the door ahead will lead to a small corridor, where 4 more Strays will spawn at each of the corners.
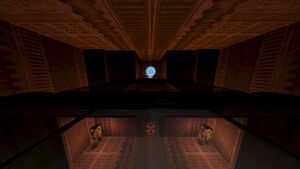
Afterwards, the player will enter into a larger room with a glass pane ceiling, where the player will be introduced to the ![]() Schism: durable, bulky husks with deformed bodies that barrage the player with sweeps of
Schism: durable, bulky husks with deformed bodies that barrage the player with sweeps of ![]() Hell Orbs. 1 Schism will spawn in front of the player, with 2 more Schisms following once the first is killed.
Hell Orbs. 1 Schism will spawn in front of the player, with 2 more Schisms following once the first is killed.
Stairway
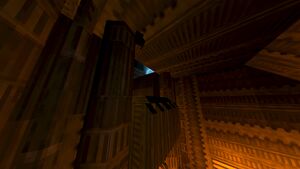
Moving forwards, the player will enter a narrow spiral staircase leading upwards to a door above, along with a door to the left of the entrance. Heading up the staircase will lead to a pile of rubble blocking the door. Attempting to break the rubble with the ![]() Feedbacker, Slamming, or any of the standard
Feedbacker, Slamming, or any of the standard ![]() Revolver variants will not break it, only responding with:
Revolver variants will not break it, only responding with:
Through the door at the bottom, a long darkened staircase leads down to a boss gate where the player would need to enter into in order to progress through the level, however the encounter is optional if the player has already gained a weapon that can destroy the rubble, such as explosives.
First Boss Encounter
For more detail on the enemy, see Swordsmachine.
Inside the arena lies a large square room with an empty shaft in the middle of the ceiling. Walking forward into the room will cause a ![]() Swordsmachine to drop down from the shaft and pierce the ground with it's sword, before pulling it out and beginning the encounter. A piece of cracked tile will also block the entrance to the arena, trapping the player inside.
Swordsmachine to drop down from the shaft and pierce the ground with it's sword, before pulling it out and beginning the encounter. A piece of cracked tile will also block the entrance to the arena, trapping the player inside.
The ![]() Swordsmachine is a melee-centric chaser, utilizing mostly swings and lunges alongside occasional hits from the
Swordsmachine is a melee-centric chaser, utilizing mostly swings and lunges alongside occasional hits from the ![]() Shotgun it wields during the encounter. All of it's melee attacks are parriable and easily cued, allowing the player to deal significant damage along with regaining their health and stamina, with the downside of the Swordsmachine becoming Enraged, making it much faster and more aggressive.
Shotgun it wields during the encounter. All of it's melee attacks are parriable and easily cued, allowing the player to deal significant damage along with regaining their health and stamina, with the downside of the Swordsmachine becoming Enraged, making it much faster and more aggressive.
Staying mobile and continually moving around the arena can easily avoid getting hit by the Swordsmachine, with staying off of the ground and strafing around the Swordsmachine being an easy counter.
Chip damage from the ![]() Piercer and
Piercer and ![]() Marksman Revolver variants, along with
Marksman Revolver variants, along with ![]() Shotgun usage with Shotgun Swapping and Projectile Boosts being useful for damage. The Shotgun can also parry with a point blank shot for extra damage, making it very useful to utilize against Swordsmachine's attacks. Later weapons such as the
Shotgun usage with Shotgun Swapping and Projectile Boosts being useful for damage. The Shotgun can also parry with a point blank shot for extra damage, making it very useful to utilize against Swordsmachine's attacks. Later weapons such as the ![]() Nailgun and the
Nailgun and the ![]() Sawblade Launcher are useful for setting up traps for the Swordsmachine to run into, and the
Sawblade Launcher are useful for setting up traps for the Swordsmachine to run into, and the ![]() Electric Railcannon can be paired with the
Electric Railcannon can be paired with the ![]() Marksman Revolver's coins for immense damage, especially with the usage of Railcoining.
Marksman Revolver's coins for immense damage, especially with the usage of Railcoining.
Depleting ![]() Swordsmachine's first health bar will cause it to kneel on the ground, dropping it's
Swordsmachine's first health bar will cause it to kneel on the ground, dropping it's ![]() Core Eject Shotgun to the player before teleporting out of the arena. A prompt will then appear detailing about the Core Eject's explosive grenade, in order to break open the tile blocking the entrance.
Core Eject Shotgun to the player before teleporting out of the arena. A prompt will then appear detailing about the Core Eject's explosive grenade, in order to break open the tile blocking the entrance.
The player will then head up to the previous rubble at the top of the staircase to break it and progress through the level.
Menacing Hallway
Entering into the next room, the player will be given another tutorial prompt on the shotgun for it's usefulness on weak enemy crowds:
Inside lies a large corridor broken up by a wall with a walkway above, with another room behind leading to a door to the left. Walking forward will spawn in 6 ![]() Filth, prompting the player to use their new
Filth, prompting the player to use their new ![]() Shotgun against them. Moving past the walkway will spawn in 3
Shotgun against them. Moving past the walkway will spawn in 3 ![]() Strays at the far end of the room, with 2
Strays at the far end of the room, with 2 ![]() Schisms appearing before the door when the player walks up to it.
Schisms appearing before the door when the player walks up to it.
Moving along leads to a small corridor strewn with pipes and other machinery, which eventually loops into the previously seen walkway. Going through the tunnel will spawn 4![]() Filth around the corner of the passage. Continuing through the door leads into the raised walkway, where a singular
Filth around the corner of the passage. Continuing through the door leads into the raised walkway, where a singular ![]() Stray will spawn in front of the player.
Stray will spawn in front of the player.
Wind Tunnel
Entering out of the walkway leads to a large tunnel with fans on either end, and a path beside the fan intersected by crushers. Moving forward will spawn in 4 ![]() Strays and a
Strays and a ![]() Schism near the far fan, with 6
Schism near the far fan, with 6 ![]() Filth spawning in by getting closer to the fan. Moving through the path with the crushers will spawn 2
Filth spawning in by getting closer to the fan. Moving through the path with the crushers will spawn 2 ![]() Strays on the other side. Moving past the crushers and the fan will lead to the next door, with 4
Strays on the other side. Moving past the crushers and the fan will lead to the next door, with 4 ![]() Filth spawning in to jump the player beforehand.
Filth spawning in to jump the player beforehand.
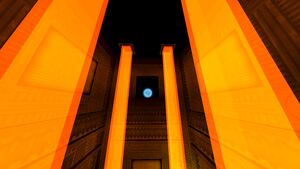
The next room is a tall room that is a continuation of the room at the start of the level, separated by a glass floor. A set of ramps are situated around the walls, leading to a door. Walking up the ramps will spawn 2 ![]() Strays situated near the entrance of the door.
Strays situated near the entrance of the door.
End Encounter
The doorway leads to the second boss arena and the end of the level, with another staircase leading upwards to the boss gate. Inside lies the Exit Elevator situated at the far end of a hallway lit by orange fluorescent panels, with the arena being much smaller than the previous encounter's stage.
Entering into the room will cause the previous ![]() Swordsmachine fought in the first arena to teleport into the room.
Swordsmachine fought in the first arena to teleport into the room.
During ![]() Swordsmachine's second phase of the fight, it will gain new, more difficult ranged attacks from its sword, consisting of a horizontal sword toss at the player, and a spiralling attack. Both of these moves while having a larger range are still parriable with both the wind up and the projectile. With the smaller arena however, dodging it's attacks are slightly more difficult, but utilizing most of the previous techniques can give the player an upper hand.
Swordsmachine's second phase of the fight, it will gain new, more difficult ranged attacks from its sword, consisting of a horizontal sword toss at the player, and a spiralling attack. Both of these moves while having a larger range are still parriable with both the wind up and the projectile. With the smaller arena however, dodging it's attacks are slightly more difficult, but utilizing most of the previous techniques can give the player an upper hand.
Once the ![]() Swordsmachine is defeated, the Exit Elevator will open and unlock the end of the level.
Swordsmachine is defeated, the Exit Elevator will open and unlock the end of the level.
Challenge
For this level's challenge, the player needs to kill only the ![]() Swordsmachine and skip all the other enemy encounters. Progressing through the level makes the challenge impossible with it requiring kills to progress, so the player must head directly to the second boss encounter by taking a shortcut to the second to last room by breaking through the glass ceiling within the first room. This can be done with a charged
Swordsmachine and skip all the other enemy encounters. Progressing through the level makes the challenge impossible with it requiring kills to progress, so the player must head directly to the second boss encounter by taking a shortcut to the second to last room by breaking through the glass ceiling within the first room. This can be done with a charged ![]() Piercer shot or explosives.
Piercer shot or explosives.
To make it up there, the player can either utilize Explosive Boosting, most recommended with the ![]() Pump Charge Shotgun, or performing a Slam Storage, involving the player to Ground Slam next to a wall and walljump off of it. Doing this correctly will keep increasing the height of a Slam Jump until the player lands on the ground, with the yellow slam particles occurring while in a regular jump. Jumping with good timing will then shoot the player into the air, easily making it up to the room above.
Pump Charge Shotgun, or performing a Slam Storage, involving the player to Ground Slam next to a wall and walljump off of it. Doing this correctly will keep increasing the height of a Slam Jump until the player lands on the ground, with the yellow slam particles occurring while in a regular jump. Jumping with good timing will then shoot the player into the air, easily making it up to the room above.
The player will then avoid killing any enemies that spawn in front of the player and head directly towards the ![]() Swordsmachine. Doing this will skip the first encounter with the boss, resulting in both Phase 1 and Phase 2 being fought at the same time.
Swordsmachine. Doing this will skip the first encounter with the boss, resulting in both Phase 1 and Phase 2 being fought at the same time.
Secrets
| #1 | 
| |
| #2 | 
| |
| #3 | 
|
Trivia
- The four Cerberus statues in the First Boss Encounter are the only destructible ones in the game.
- Because the rock blocking the Menacing Hallway used to be destructible using the
 Piercer Revolver, it was possible to skip the Lower Arena, and the
  Core Eject Shotgun altogether (Though skipping to the top of the tower at the start can also allow the player to skip the Shotgun).
 - During the first
 Swordsmachine encounter it is possible to kill it (adding +1 to your kill count.) Despite already killing the
  Swordsmachine, in its second encounter it will spawn with full health.
 - Destroying the rock blocking the exit to the First Boss Encounter will allow the player to leave the arena. however the Swordsmachine can follow, but will have broken nav mesh when attempting to walk up the stairs, in the demo, this cannot happen, the Swordsmachine will remain stuck, but the second bossfight will have full health instead of just half health.
- It is possible to break the level by collecting checkpoints in an unintended order. To trigger this glitch, first reach the last checkpoint in the level right outside the Upper Arena, then backtrack to collect the checkpoint outside the First Boss Encounter, then return to the Second Boss Encounter, activate the second Swordsmachine fight, and then die. You will respawn outside the Lower Arena, but the boss health bar for the second Swordsmachine fight will still be present at the top of the screen. Additionally, the entire level other than the staircase down to the Lower Arena and the arena itself will be permanently unloaded even if you go through the door to the stairwell.
- Activating the first Swordsmachine fight while this glitch is active will cause a second boss health bar to appear. This is not normally possible, since exiting the first Swordsmachine fight and continuing through the level causes the first health bar to disappear, and it isn't possible to exit the second Swordsmachine fight to return to the rest of the level.
- By going into the unloaded stairwell, you can see that a normally inaccessible fan is present underneath the stairway down to the Lower Arena. This indicates that the level might have originally allowed the user to jump or fall off the sides of the stairway, unlike the current version of the level where the pitch-black boundaries at the sides of the stairway serve as walls keeping the player on the stairs.
- The level's name is a reference to the 2005 Neil Breen movie Double Down.[1]
- If one skips the First Boss Encounter and gets the Swordsmachine to phase 2 in the Second Boss Encounter while not owning the shotgun, they will obtain it after dying, respawning and reentering the arena.
- If you skip the First Boss Encounter and don't collect the shotgun, in the Second Boss Encounter fight Swordsmachine will drop the shotgun upon hitting half health.
