1-4: Clair de Lune
| 1-4: CLAIR DE LUNE | |||
|---|---|---|---|
| |||
| General | |||
| Layer & Part | LIMBO /// CLIMAX | ||
| Challenge | Do not pick up any skulls. | ||
| Music | Clair de Lune Versus | ||
| Tip of the Day | |||
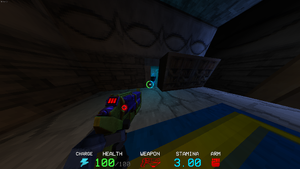
The ATTRACTOR NAILGUN's magnets can be attached to enemies to make mobile targets easy to hit with nails.
| |||
| Collectables | |||
| Enemies | |||
| Rank Requirements | |||
| Rank | Time | Kills | Style |
| S | 02:15 | 0 | 600 |
| A | 03:00 | 0 | 500 |
| B | 04:00 | 0 | 300 |
| C | 05:00 | 0 | 150 |
- This article covers a simplified account of the first boss fight for V2. For more detail on the boss, see V2. For V2's fight in 4-4, see V2 (2nd).
1-4: CLAIR DE LUNE is the fourth and final level of Limbo, starring the first encounter with ![]() V2, who holds the
V2, who holds the ![]() Knuckleblaster. 1-4 also contains the final
Knuckleblaster. 1-4 also contains the final ![]() Slab, used to unlock the
Slab, used to unlock the ![]() Alternate Revolver, a.k.a the Slab Revolver. 1-4 also holds the first readable lore book. The music used in the level starts with Claude Debussy's Clair De Lune, and Versus for V2's boss music.
Alternate Revolver, a.k.a the Slab Revolver. 1-4 also holds the first readable lore book. The music used in the level starts with Claude Debussy's Clair De Lune, and Versus for V2's boss music.
Level
Start
The beginning of 1-4 starts off with a long stretch of peaceful outdoor gardens and stone pathway, leading to a large manor housing various rooms and corridors. In the center of the walkway lies a stained glass window depicting ![]() Gabriel. Underneath it lays a headless skeleton, praying in front of the visage with the words "FORGIVE ME" written on the wall with blood.
Gabriel. Underneath it lays a headless skeleton, praying in front of the visage with the words "FORGIVE ME" written on the wall with blood.
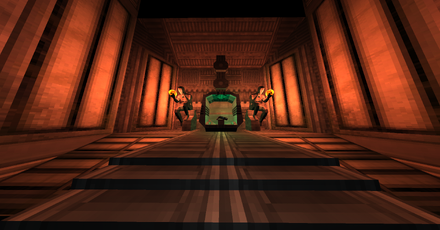
Moving directly forward leads to a room with a gated door requiring 3 Skull Keys to open, needing the player to search through the level for hidden Keys to unlock the boss arena.
Confessions
Starting from the top walkway, heading into a door to the right will lead to a small bedroom containing a bookshelf, a shattered mirror with blood, and a desk with a book set on top. Walking up to it will trigger a short prompt:
Picking up the book will then display a short "scanning" popup, before displaying an excerpt of the text:
". . . My mind is adrift with the eternal torments. Lurid vistas painted in insidious tones, hollow walls that scream to the touch. A mocking song plays at all hours, even the sounds of birds are fake. All reminders of my enduring damnation.
Gabriel my dearest friend, in endless penance I have awaited your embrace into Heaven. I have been so faithful, accepting of my fate, but to what end? What punishment is this, that I am to bare the keys to my own doom with no hope of salvation. . . These skulls sneer their devilish grins, voices chattering, tempting me to take the plunge deeper into Hell. . . I won't do it.
I've hidden them away amongst the furnishings, books, and the very foundations of this accursed place. Forgive me Gabriel, I will await your..."
REMAINING TEXT: IRRELEVANT.
Underneath it lies a short message on how to close the excerpt:
Skull Hunt
Using the clues given by the book, the player will then have to find the rest of the Skulls hidden throughout the level. The first one lies hidden behind the bookshelf in the same room. Pushing against the bookshelf to slide it out of the way will reveal the skull key.
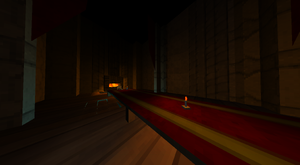
The second Skull is located through the right door below the overhead walkway, entering to a dining hall with a long dinner table and a fireplace. The skull is placed underneath a set of loose floorboards, with the player needing to break them to access the key.
The third Skull is located in the room to the left side of the second floor. However the door to it is unable to move, requiring the player to go through the bottom left door to a small open courtyard outside the main hall. There, the player can break a window to get into the locked room, and collect the third Skull.
An optional fourth Skull can also be found hidden behind the stained glass window of Gabriel, revealing it to be a hologram. If the player places the skull on the kneeling skeleton, a short message will be shown below:
Once a skull is placed on a pedestal and the player re-enters the manor, they will have a glance at ![]() V2 sliding down the hallway when the gate opens. While it appears to be sliding from the courtyard towards the dining room, V2 cannot be found there and does not re-appear until the boss battle.
V2 sliding down the hallway when the gate opens. While it appears to be sliding from the courtyard towards the dining room, V2 cannot be found there and does not re-appear until the boss battle.
Final Slab
Back in the bottom left courtyard lies a path to a large stone door, and a ![]() Slab lock. This door connects to 4 different stone Slab locks found throughout each level in Limbo, activated by completing optional challenges or finding hidden secrets. If all of the previous Slabs were activated in a given save, activating the fourth slab unlocks the door to reveal the
Slab lock. This door connects to 4 different stone Slab locks found throughout each level in Limbo, activated by completing optional challenges or finding hidden secrets. If all of the previous Slabs were activated in a given save, activating the fourth slab unlocks the door to reveal the ![]() Alternate Revolver, a side-grade to the standard
Alternate Revolver, a side-grade to the standard![]() Revolver with higher damage yet slower shot speed. A Terminal lies in the room just in front of the left side of the door.
Revolver with higher damage yet slower shot speed. A Terminal lies in the room just in front of the left side of the door.
Picking up the Alternate Revolver will trigger a prompt about alternate Variants:
They can be equipped at the SHOP.
Moving away from the area afterwards will trigger another prompt about the Alternate Revolver itself:
Hammer has to pull back after each shot.
Boss Encounter
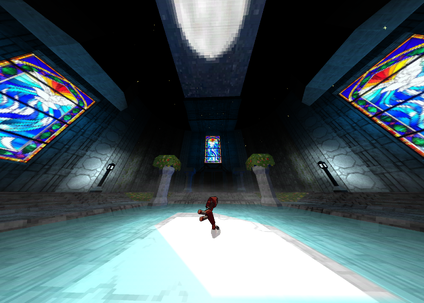
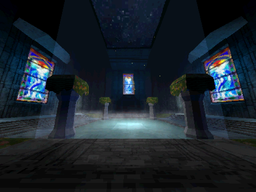
Placing a skull on all 3 pedestals will unlock the gate leading to the boss arena: a large open square courtyard lined with stained glass paintings and a pool of shallow water within the center, lit by a moonlit skylight. Entering the room will also fade out the previously playing classical music.
Walking forward will trigger the encounter with ![]() V2, who jumps through the window opposing the entrance: knocking the player into the air. It will then bow to the player before starting the boss fight.
V2, who jumps through the window opposing the entrance: knocking the player into the air. It will then bow to the player before starting the boss fight.
![]() V2 is a mobile, hard to hit boss, serving as a test for the player's weapon arsenal, movement, and aim. Reacting to the player's behavior, it will change its pattern of movement to try and gain an upper hand, indicated by the color of its wings.
V2 is a mobile, hard to hit boss, serving as a test for the player's weapon arsenal, movement, and aim. Reacting to the player's behavior, it will change its pattern of movement to try and gain an upper hand, indicated by the color of its wings.
If the player is aggressive, it will back off: indicated by green. If the player stays away from it, V2 will move closer to the player and be more aggressive: indicated by red. V2 will also either circle strafe around the player: indicated by blue, or pick a random direction to move in, indicated by gold. If the player stays away from V2 for too long, it will become Enraged, increasing its speed and becoming much more aggressive and dangerous. Maintaining stamina and dashes are crucial to survive.
![]() V2 has two weapons at its disposal, the
V2 has two weapons at its disposal, the ![]() Piercer Revolver and
Piercer Revolver and ![]() Core Eject Shotgun, with four attacks in total. These consist of a Revolver Burst with 3 consecutive Revolver shots, a Charge Shot from the Piercer, a basic Shotgun Blast which can be parried for health and stamina, and the Core Eject Grenade, sending an explosive grenade at the player.
Core Eject Shotgun, with four attacks in total. These consist of a Revolver Burst with 3 consecutive Revolver shots, a Charge Shot from the Piercer, a basic Shotgun Blast which can be parried for health and stamina, and the Core Eject Grenade, sending an explosive grenade at the player.
Weapons such as the ![]() Marksman Revolver, both
Marksman Revolver, both ![]() Shotguns,
Shotguns, ![]() Attractor Nailgun and
Attractor Nailgun and ![]() Overheat Nailgun are reliable damage dealers during the fight, with Coins being always able to hit V2 and Projectile Boosts from the Shotguns dealing lots of damage. Sticking a magnet from the Attractor Nailgun makes bursts from both Nailguns home in on V2. Later weapons such as the
Overheat Nailgun are reliable damage dealers during the fight, with Coins being always able to hit V2 and Projectile Boosts from the Shotguns dealing lots of damage. Sticking a magnet from the Attractor Nailgun makes bursts from both Nailguns home in on V2. Later weapons such as the ![]() Railcannon and
Railcannon and ![]() Rocket Launcher can also help as well, with the
Rocket Launcher can also help as well, with the ![]() Electric Railcannon being able to stack with the Marksman's coins for even more damage, and the Rocket Launcher being able to send
Electric Railcannon being able to stack with the Marksman's coins for even more damage, and the Rocket Launcher being able to send ![]() V2 into the air for airshots and juggling.
V2 into the air for airshots and juggling.
End
Once V2's health bar is depleted, it will be knocked onto the floor, screaming in pain. After standing up again, it will run towards the center and escape the arena through the fake sky, dropping the ![]() Knuckleblaster in the process. Once picked up, a tutorial prompt on arm swapping appears:
Knuckleblaster in the process. Once picked up, a tutorial prompt on arm swapping appears:
The exit gate will open once the player picks up the Knuckleblaster.
Challenge
The stained glass window above the skull-locked door can be broken with any weapon or arm, then jumped through to directly enter the boss arena without needing to collect the Skull Keys to open the door.


