Checkpoint
See also: Player Mechanics, Difficulties, Game Mechanics
Checkpoints are objects found inside most of ULTRAKILL's levels. They serve as locations for the player to respawn using the "Checkpoint" button in the pause menu or after death.
Description
There are 5 kinds of Checkpoints.
Checkpoints are translucent pink inscribed with the word "CHECKPOINT" in the middle. They often appear between 2 walls, making them difficult or even sometimes impossible to avoid. When touched, they disappear. They are first introduced right in 0-1: Into the Fire, and appear in all regular levels onwards. These Checkpoints can be spawned using the ![]() Spawner Arm when in the Sandbox.
Spawner Arm when in the Sandbox.
Invisible Checkpoints are Checkpoints with the same effect as normal ones, but no external appearance. Examples of such checkpoints can be encountered at the beginning and end of 7-1: Garden of Forking Paths and in the beginning of P-2: Wait of the World. They do not behave any differently from visible checkpoints other than being undetectable.
Reusable Checkpoints are round, reusable checkpoints that re-appear after some time or when capturing another checkpoint. They make their debut in 4-2: God Damn the Sun. Notably, there are a few exceptions of checkpoints that are round but are not Reusable. These can be found in 4-4: Clair de Soleil, 5-1: In the Wake of Poseidon, and 5-2: Waves of the Starless Sea.
Checkpoint Crates are wooden crates with big yellow C on the sides, mirroring the look of checkpoint crates from Crash Bandicoot games. When destroyed, they act as regular Checkpoints. They are encountered exclusively in 4-S: Clash of the Brandicoot.
Spawn Points are translucent blue, inscribed with the words "SPAWN POINT". They are exclusively found using the ![]() Spawner Arm when in the Sandbox and their primary use is to act as a point that the player can load from when opening a Sandbox save.
Spawner Arm when in the Sandbox and their primary use is to act as a point that the player can load from when opening a Sandbox save.
Behavior
Checkpoints allow the player to restart from a set location, whichever one was last touched by the player. They can be accessed using the "Checkpoint" button in the Pause Menu, or by restarting after a death. If the player has not interacted with any Checkpoint in the level, performing either of these actions will restart the level.
Checkpoints will reset the player's state to full health and stamina, with all weapon cooldowns at maximum and previously-gained power-ups disabled. They will also reset the state of enemies to wherever they were when the checkpoint was originally interacted with. While checkpoints reset combat encounters, they do not reset things like most destructible objects, certain interactable objects such as Skull Keys and tablets/buttons, and unlockables such as weapons found within the level.
Many encounters, particularly those with bosses, will skip or speed up a previously shown introduction if the player restarts from a checkpoint after seeing them.
In Lenient difficulty, restarting from the same checkpoint 3 or more times will cause the player to gain 101 health, and have their maximum health set to 200 instead of 100.
Spawn Point checkpoints are not interacted with but rather serve as a set point where, if placed in a Sandbox save, the player will load from when opening that save. They function exclusively within the Sandbox.
List of Checkpoints
Checkpoints marked with * are Reusable Checkpoints.
Prelude
| Number and Name | Total Checkpoints | Checkpoint Locations |
|---|---|---|
| 0-1: Into the Fire | 6 |
|
| 0-2: The Meatgrinder | 3 |
|
| 0-3: Double Down | 4 |
|
| 0-4: A One-Machine Army | 2 |
|
| 0-5: Cerberus | 1 |
|
| 0-S: Something Wicked | 0 | N/A |
LAYER 1: Limbo
| Number and Name | Total Checkpoints | Checkpoint Locations |
|---|---|---|
| 1-1: Heart of the Sunrise | 4 |
|
| 1-2: The Burning World | 3 |
|
| 1-3: Halls of Sacred Remains | 7 |
|
| 1-4: Clair de Lune | 2 |
|
| 1-S: The Witless | 0 | N/A |
LAYER 2: Lust
| Number and Name | Total Checkpoints | Checkpoint Locations |
|---|---|---|
| 2-1: Bridgeburner | 2 |
|
| 2-2: Death at 20,000 Volts | 2 |
|
| 2-3: Sheer Heart Attack | 5 |
|
| 2-4: Court of the Corpse King | 2 |
|
| 2-S: All-Imperfect Love Song | 0 | N/A |
LAYER 3: Gluttony
| Number and Name | Total Checkpoints | Checkpoint Locations |
|---|---|---|
| 3-1: Belly of the Beast | 5 |
|
| 3-2: In the Flesh | 1 |
|
LAYER 4: Greed
| Number and Name | Total Checkpoints | Checkpoint Locations |
|---|---|---|
| 4-1: Slaves to Power | 5 |
|
| 4-2: God Damn the Sun | 4 |
|
| 4-3: A Shot in the Dark | 3 |
|
| 4-4: Clair de Soleil | 3 | |
| 4-S: Clash of the Brandicoot | 7
All checkpoints in 4-S are Checkpoint Crates, save for the first checkpoint. |
|
LAYER 5: Wrath
| Number and Name | Total Checkpoints | Checkpoint Locations |
|---|---|---|
| 5-1: In the Wake of Poseidon | 6 |
|
| 5-2: Waves of the Starless Sea | 4 |
|
| 5-3: Ship of Fools | 6 |
|
| 5-4: Leviathan | 1 |
|
| 5-S: I Only Say Morning | 0 | N/A |
LAYER 6: Heresy
| Number and Name | Total Checkpoints | Checkpoint Locations |
|---|---|---|
| 6-1: Cry for the Weeper | 5 |
|
| 6-2: Aesthetics of Hate | 1 |
|
LAYER 7: Violence
| Number and Name | Total Checkpoints | Checkpoint Locations |
|---|---|---|
| 7-1: Garden of Forking Paths | 4 |
|
| 7-2: Light Up the Night | 6 |
|
| 7-3: No Sound, No Memory | 4 |
|
| 7-4: ...Like Antennas to Heaven | 6 |
|
| 7-S: Hell Bath No Fury | 4 |
|
Prime Sanctums
| Number and Name | Total Checkpoints | Checkpoint Locations |
|---|---|---|
| P-1: Soul Survivor | 1 |
|
| P-2: Wait of the World | 5 |
|
Media
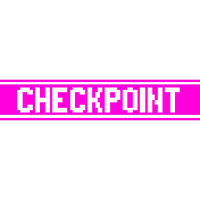
A standard Checkpoint.
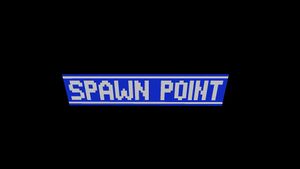
A Spawn Point.
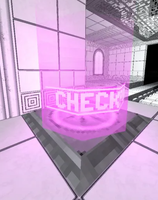
An example of a reusable Checkpoint in 7-2: Light Up the Night.
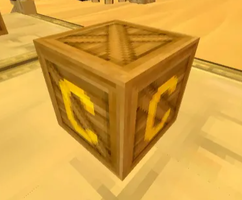
A Checkpoint Crate in 4-S: Clash of the Brandicoot.


Trivia
- 4-S: Clash of the Brandicoot and 7-S: Hell Bath No Fury are the only secret levels to contain Checkpoints.