Hideous Mass
| HIDEOUS MASS | |||||
|---|---|---|---|---|---|

| |||||
| General | |||||
| Class | Greater Demon | ||||
| Health | 175 (Boss) 60 (Common) | ||||
| Weight | Heavy (Grounded) | ||||
| Rank | 6 | ||||
Head (2x)
|
✗ | ||||
Limb (1.5x)
|
✓ (Belly) | ||||
| Conditional Modifiers | |||||
Flammable?
|
|||||
Airshot?
|
|||||
| Damage Type Modifiers | |||||
| - All Damage (Belly): 300% - All Damage (Tail): 300% | |||||
| Radiance Multipliers | |||||
| Health | 1x | ||||
| Damage | 1x | ||||
| Speed | 1x | ||||
| Appearances | |||||
| 1-3 (Boss)
| |||||
| Cyber Grind Data | |||||
| Wave | Cost | Spawns | |||
| 13 | 45 | H | |||
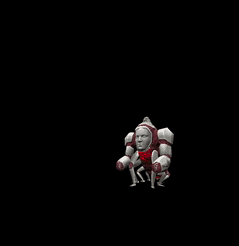
The Hideous Mass is a large Demon-type enemies players encounter, first debuting in 1-3 as a boss.
It
has a bright white shell with many faces engraved on it, along with 2 large arms, 8 legs and a tail.
Behavior
Hideous Masses are completely stationary, only turning to face the player. They have 2 forms they can switch into, Upright and Lowered, that they will switch to depending on how aggressive a player is. They will perform different attacks in both positions. Shooting the shell deals no damage to a Hideous Mass and it will reflect hitscans and projectiles.
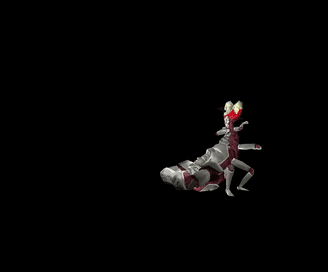
Hideous Masses will become Enraged after having their health depleted to below 20% (35 HP, 1-3 boss) or 33% (20 HP, all other encounters), rolling over onto its back and exposing both of its weakpoints.
While enraged it will only shoot Hell Mortars.
Attacks
Hell Mortars
This attack can only be performed while a Hideous Mass is in its upright form. The Hideous Mass will shoot 2 Hell Mortars into the air that have limited homing, deal 60 damage and create a large explosion that deals 40 damage.
The mortar projectiles can be parried but not deflected.
Ground Slam
The Hideous Mass will wind up to slam the ground violently and create a shockwave that deals 40 damage.
It will always use the ground slam before it enters the lowered position.
If the player is too high or too low for the shockwave to reach, it will only use the ground slam once, using the clap attack more often.
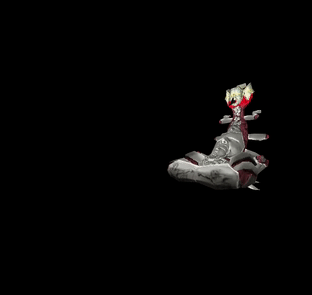
Clap
In its lowered position the Hideous Mass can clap its arms together, creating a vertical shockwave that deals 20 damage.
It will always clap after the first ground slam.
Getting caught in between the Hideous Mass' arms while it is clapping will deal 40 damage.
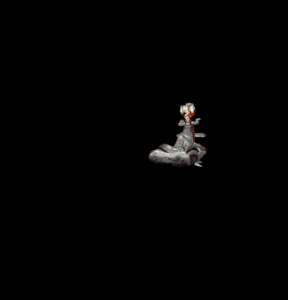
Harpoon
Hideous Mass, while lowered, can use its tail to shoot an extremely fast harpoon that severely handicaps the player's movement and deals 25 damage.
The harpoon can be dislodged by punching it twice with the ![]() Feedbacker, punching it once with the
Feedbacker, punching it once with the ![]() Knuckleblaster or dealing 6 damage to the tail.
Knuckleblaster or dealing 6 damage to the tail.
The harpoon can be parried, but the timing can be tricky. The timing can be made more lenient by dashing forwards or backward while looking at the tail, or holding back. Successfully parrying the harpoon will deal 30 damage to the Hideous Mass, meaning two parries are enough to kill a Common variant. Unlike most projectiles, parrying the harpoon will always send it back to the tail, preventing it from being redirected to hit another enemy.
If a Hideous Mass is Radiant, the harpoon will deal 30 damage times its Radiance Damage multiplier. For example, if the Hideous Mass has a damage multiplier of 1.5x, then it will deal 45 damage to the mass (reduced by any health modifiers).
Strategy
The Hideous Mass tends to spawn alone or in pairs, and it is an extremely dangerous enemy that should be prioritized at all costs.
The abdomen and the tail are weakpoints that take triple damage from all attacks. ![]() Shotgun swapping and punching the abdomen or tail with the Knuckleblaster is one of the most effective ways to quickly take care of a Hideous Mass and gain large amounts of health. The
Shotgun swapping and punching the abdomen or tail with the Knuckleblaster is one of the most effective ways to quickly take care of a Hideous Mass and gain large amounts of health. The ![]() Nailguns can also take care of a Hideous Mass within seconds. Both the
Nailguns can also take care of a Hideous Mass within seconds. Both the ![]() Alternate Piercer's and the
Alternate Piercer's and the ![]() Sharpshooter's primary and alternate fires can deal grave damage to a Hideous Mass in a burst. The
Sharpshooter's primary and alternate fires can deal grave damage to a Hideous Mass in a burst. The ![]() Electric Railcannon is the best weapon to use against a Hideous Mass, as it not only takes out a gigantic chunk of a Hideous Mass' health on its own, but, with the use of Railcoining, it can instantly kill a Hideous Mass on the spot. Another way to swiftly kill a Hideous Mass is through the use of the
Electric Railcannon is the best weapon to use against a Hideous Mass, as it not only takes out a gigantic chunk of a Hideous Mass' health on its own, but, with the use of Railcoining, it can instantly kill a Hideous Mass on the spot. Another way to swiftly kill a Hideous Mass is through the use of the ![]() Sawblade Launchers; by placing a magnet on a Hideous Mass's chest, unloading the Attractor variant's magazine and then using up the Overheated Sawblade of the
Sawblade Launchers; by placing a magnet on a Hideous Mass's chest, unloading the Attractor variant's magazine and then using up the Overheated Sawblade of the ![]() Overheat variant, one can ensure a kill on the Hideous Mass and can safely retreat to deal with other enemies that must be prioritized.
Overheat variant, one can ensure a kill on the Hideous Mass and can safely retreat to deal with other enemies that must be prioritized.
Dodging a Hideous Mass is difficult and a mistake can cost the player's life. The Harpoon must be avoided at all costs; it cripples the player's movement options and makes them an easy target. If you get caught by the Harpoon, punching it once with the Knuckleblaster as fast as possible is necessary in order to survive the next attacks of a Hideous Mass. The Hell Mortars are equally as dangerous, as they deal 60 damage and have homing, albeit limited. Slide jumping or dash jumping around a Hideous Mass is the best way to avoid damage, although one must remember to jump over the Hideous Mass's horizontal shockwave.
In the encounter in 1-3, you can obtain the Soap and throw it at the Hideous Mass, effectively skipping the fight.
Difficulty Changes
Harmless
- Hideous Mass does not use its harpoon.
- The vertical shockwave from its clap is very small.
Lenient
- The vertical shockwave from its clap is very small.
Brutal
- Hideous Mass Can now shoot its harpoon when enraged
- Harpoon now has 50% more health
Terminal Entry
DATA:
Hideous Masses are a rare occurrence, when an excessive amount of Hell Mass is poured into a single shell, causing it to overflow and burst at the seams.
Due to the broken seams allowing for mobility without having to bend the exterior, the stone has hardened more than the shell of most demons, making it completely impervious to all currently known attacks.
STRATEGY:
- Although its stone exterior makes for an impenetrable defense, the Hideous Mass' belly and tail remain exposed and vulnerable.
- While standing up, a quick burst of close range damage is the most effective way to hurt them, though this will most likely cause it to change formations, so being quick and decisive is the key.
- When in its low formation, keeping a safe distance is recommended due to its melee capabilities and high speed tail harpoon, though the brave or suicidal may attempt to climb on its back to continue dealing close range damage to the tail.
Media
Hideous Mass using its mortars.
Hideous Mass slamming the ground.
Hideous Mass clapping its arms together.
Hideous Mass shooting a harpoon.
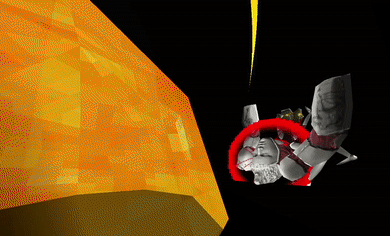
Hideous Mass while enraged.
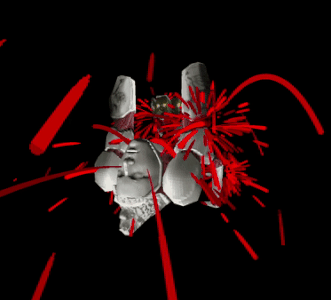
Hideous Mass dying.


