7-1: Garden of Forking Paths
| 7-1: GARDEN OF FORKING PATHS | |||
|---|---|---|---|
| |||
| General | |||
| Layer & Part | VIOLENCE /// FIRST | ||
| Challenge | Beat the secret encounter. | ||
| Music | The World Looks White The World Looks Red Bull of Hell | ||
| Tip of the Day | |||
Homing projectiles may be more difficult to dodge,
but their tracking and slower speed makes them much easier to parry. | |||
| Collectables | |||
| Enemies | |||
| Rank Requirements | |||
| Rank | Time | Kills | Style |
| S | 06:40 | 51 | 17,000 |
| A | 07:30 | 48 | 15,000 |
| B | 10:00 | 40 | 10,000 |
| C | 15:00 | 20 | 5,000 |
7-1: GARDEN OF FORKING PATHS is the first level of Violence, which introduces the ![]() Mannequin and reintroduces the Tram Cart from 2-4: Court of the Corpse King. 7-1 also stars the
Mannequin and reintroduces the Tram Cart from 2-4: Court of the Corpse King. 7-1 also stars the ![]()
Minotaur as a boss encounter, and houses a secret encounter with ![]() Big Johninator. The songs used for the level starts with The World Looks White for the intro and The World Looks Red for combat, with Bull Of Hell being used for the
Big Johninator. The songs used for the level starts with The World Looks White for the intro and The World Looks Red for combat, with Bull Of Hell being used for the Minotaur.
Level
Start
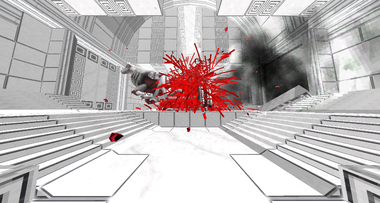
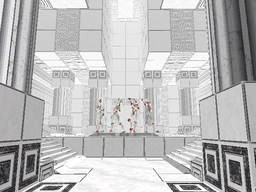
Starting off the level, the screen will briefly flash white as the player enters a fully white courtyard engulfed by a thick blinding fog. White trees and large stone crosses surround the marble walkway underneath the player, which leads to the entrance of an Labyrinth made of marble.
Venturing inside the building, the player enters a room with three sets of doors, the set on the right are revealed to be locked, and the doors on the left will shut before the player when approached, leaving only the doors right ahead open. Leading into a long gallery of six posing ![]() Mannequins each stationed on a small stage, a large door stands at the room's far end, reaching it causes an empty Red Skull Pedestal to rise out from the floor, prompting the player to find a Red Skull Key in order to unlock the door behind it.
Mannequins each stationed on a small stage, a large door stands at the room's far end, reaching it causes an empty Red Skull Pedestal to rise out from the floor, prompting the player to find a Red Skull Key in order to unlock the door behind it.
Returning to the first room will reveal the previously locked door to be open, passing it leads to a narrow corridor with a high ceiling, requiring the player to walljump up a wall in order to reach the higher floor. A large door opens to reveal a high room acting as an intersection, housing a button with the Greek Letter Alpha (α) and a Blue Skull Pedestal. The faint bellow of a bull can be heard when getting in close proximity of the button, pressing it shows a prompt notifying the player a door has been unlocked elsewhere in the level.
Nearby the entrance of the intersection, a book can be found:
DISPLAYING FINAL PAGE:
The unending halls of the Garden! Ah, so dutifully decorated by the cross, the symbol that angels use for the Tree of Life. They praise their beloved Father who had planted it and filled us with the dew of its leaves and the nectar of it's fruit, that which gives us life, courses through our veins...
For you however, our truth: Our bodies are not a vessel for the blood of the fruit, but it's prison. The beautiful guts and gorgeous bone YEARN to be shown and seen! SPLAYED! Under the divine cross of the Tree of Life, we pay it tribute through the art of violence.
THE WORLD IS YOUR CANVAS
SO TAKE UP YOUR BRUSH
AND PAINT
THE WORLD
R E D.
Mannequin Encounter
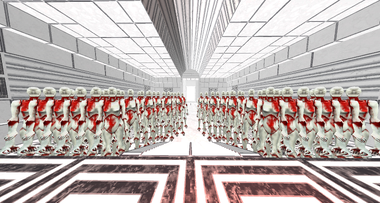
After interacting with the button, the player heads down back to the start of the labyrinth where the previously closed door is opened, revealing a large crowd of stationary ![]() Mannequins flooding the room. A centered path leads the player to a kneeling Mannequin behind gates, its head replaced with a Red Skull Key. Nearing the gate opens it and allows for the skull to be collected, but doing so will trigger the Mannequins to surround and face the player, with none actually attacking.
Mannequins flooding the room. A centered path leads the player to a kneeling Mannequin behind gates, its head replaced with a Red Skull Key. Nearing the gate opens it and allows for the skull to be collected, but doing so will trigger the Mannequins to surround and face the player, with none actually attacking.
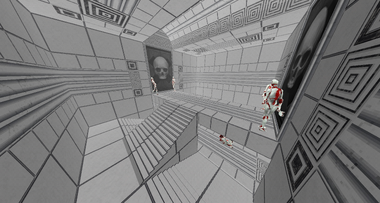
Returning to the Mannequin gallery room and Red Pedestal, the player will be ambushed by 6 Mannequins breaking out of their poses to skitter towards the player at rapid speeds, starting their first enemy encounter. The doors are blocked off by a black wall, on it is the depiction of a realistic skull.
After all Mannequins are killed, the wall retracts to allow for the player to continue through the level.
Labyrinth
Descending down from a split staircase, the player makes it to a small room with a walkway and two split staircases at each side, in each corner stands a stationary ![]() Mannequin with 4 active Mannequins hidden underneath the walkway. Another skull-faced wall blocks off the door during the encounter, only lifting when all enemies are killed.
Mannequin with 4 active Mannequins hidden underneath the walkway. Another skull-faced wall blocks off the door during the encounter, only lifting when all enemies are killed.
The next room is a a tall chamber lined with a grand spiraling staircase (similar to the one found in 5-3) with a Blue Skull Key in front of the entrance and a ![]() Blue Hookpoints high above. Entering the room spawns in 3 Mannequins on the walls and a
Blue Hookpoints high above. Entering the room spawns in 3 Mannequins on the walls and a ![]() Virtue at the top of the stairs, killing the enemies is not required in order to pass through the door atop of the stairs, which loops back to the intersection with the α Button and Blue Pedestal.
Virtue at the top of the stairs, killing the enemies is not required in order to pass through the door atop of the stairs, which loops back to the intersection with the α Button and Blue Pedestal.
Unlocking the door the player enters a tall curved corridor, a walkway with two shallow waterlogged canals leads the player into a large open room. 4 Mannequins in various poses stand alongside each other before a Blue Pedestal and a large door. Walking towards the Mannequins will cause a massive bull-like demon, the ![]()
Minotaur, to barge in through a door to the right and run over the Mannequins in its wake, charging past to the left of the entrance.
Following the Minotaur to the next room will start an encounter with a ![]() Malicious Face at the far end of the room and 2 Mannequins on the ceiling, along with 2 inactive
Malicious Face at the far end of the room and 2 Mannequins on the ceiling, along with 2 inactive ![]() Cerberi stationed nearby. Killing either the Malicious Face or the Mannequin will awaken both Cerberi and 2 Mannequins hidden on a lower floor.
Cerberi stationed nearby. Killing either the Malicious Face or the Mannequin will awaken both Cerberi and 2 Mannequins hidden on a lower floor.
After the encounter, the player enters a small room with a door to the left, right ahead lies a pile of collapsed rubble left behind by the Minotaur. Heading through the door will loop back around to the grand spiral staircase, which connects to the Blue Skull placed in the α Button Room. The player needs to take the Blue Skull along the new route and place it on the recently discovered Blue Pedestal.
Heading through the opened door at the room with the Minotaur sequence leads to an enclosed spiral staircase, where the player fights a ![]() Mannequin and 2
Mannequin and 2 ![]() Streetcleaners at the bottom of the stairs. The next room over houses a tall chamber with a staircase leading up a set of three floors, with a Blue Hookpoint in the middle of the chamber and another Blue Pedestal at the bottom.
Streetcleaners at the bottom of the stairs. The next room over houses a tall chamber with a staircase leading up a set of three floors, with a Blue Hookpoint in the middle of the chamber and another Blue Pedestal at the bottom.
Entering inside will spawn a ![]() Virtue and 2
Virtue and 2 ![]() Mannequins at the bottom floor, along with a Mannequin at the top. Killing the
Mannequins at the bottom floor, along with a Mannequin at the top. Killing the ![]() Virtue will spawn 2
Virtue will spawn 2 ![]() Drones at the bottom and another
Drones at the bottom and another ![]() Virtue at the top floor. Killing the bottom floor Mannequin to the right or the one at the top floor will spawn in 2
Virtue at the top floor. Killing the bottom floor Mannequin to the right or the one at the top floor will spawn in 2 ![]() Drones at the top floor, and killing the left Mannequin will spawn in a
Drones at the top floor, and killing the left Mannequin will spawn in a ![]() Mindflayer on the middle floor, with it also spawning in the bottom floor Drones if the
Mindflayer on the middle floor, with it also spawning in the bottom floor Drones if the ![]() Virtue hadn't been killed. Killing the remaining enemies will spawn in 3 more
Virtue hadn't been killed. Killing the remaining enemies will spawn in 3 more ![]() Mannequins at the top and bottom floors.
Mannequins at the top and bottom floors.
After killing all the enemies, the player can then head through to a door at the top floor, which loops to an outdoor walkway leading into the ![]()
Minotaur sequence room with the Blue Skull. The player then needs to collect the skull again and head through the pathway to place it on the pedestal in the previous arena.
Underground Tunnels
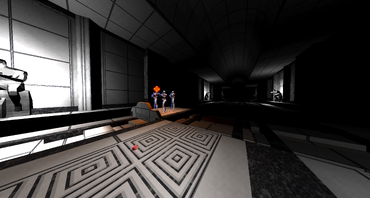
Placing the Blue Skull onto its pedestal opens the path to a dark shaft leading down through the labyrinth. Jumping through the shaft leads to a dimly lit chamber, with a set of winding corridors leading to another shaft. Jumping through leads to the start of a railway tunnel, with a tram cart situated at the start of the tracks along with a Terminal nearby.
An activation button is situated on the front of the cart, which when pressed will activate it and cause it to start moving along the tracks. During the starting segment of the tram-ride, the player is locked within the bounds of the tram cart by an invisible wall, to prevent the player from falling off of the tracks. Positional momentum relative to the cart is sent backwards away from it, so projectiles and the player's position while airborne is sent trailing away from the cart.
Eventually the railway converges with two other rail tracks from either side of the main track, turning the tunnel into a three lane railway. After this point, the tunnel then turns into an infinite loop of the same track segment as the cart continually moves forward. During this segment, the player is free to jump off the cart, and projectiles and objects will stay relative to the cart, acting as if on a normal unmoving object.
Falling off will deal damage to the player on contact with the tracks or the sides of the tunnel, and enemies that fall off will be instantly killed, giving the +ROADKILL style bonus.
During this segment, enemies will start to appear on separate carts to fight the player. Firstly, 3 ![]() Strays appear on a cart on the left track, heading from in front of the player's cart. Then 3
Strays appear on a cart on the left track, heading from in front of the player's cart. Then 3 ![]() Soldiers appear from the bottom right, and a group of 2
Soldiers appear from the bottom right, and a group of 2 ![]() Schisms and a
Schisms and a ![]() Soldier appears from a cart behind the player. However before it can reach the player, the
Soldier appears from a cart behind the player. However before it can reach the player, the ![]()
Minotaur appears from behind it and destroys the cart as an introduction to its boss fight.
Railway Boss Encounter
The ![]()
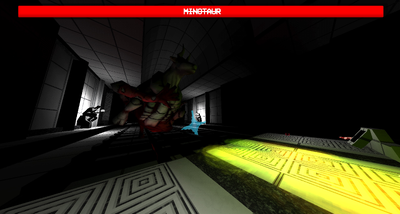
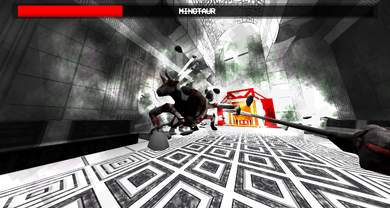
Minotaur will continually chase the player's cart as it rides through the tunnel, along with attacking with large swings and disrupting the player's stable ground by destroying the tram carts or putting damaging hazards onto them. During this encounter, the Minotaur has three main attacks:
- A three hit combo, with a horizontal swing from its hammer, and two slower overhead swings.
- A faster two hit combo with a horizontal swing and one vertical swing, with the last hit targeting the nearest tram cart to the player to break it.
- An acid throw, where the Minotaur will reach into its gut and toss a pool of acid onto one of the tram carts.
During the fight, carts carrying ![]() Strays will occasionally appear to fill in any broken carts the Minotaur has left, along with giving the player some healing. The
Strays will occasionally appear to fill in any broken carts the Minotaur has left, along with giving the player some healing. The ![]() Strays do not count towards the level's kill quota for the ranking.
Strays do not count towards the level's kill quota for the ranking.
The ![]()
Minotaur is mainly covered in impervious stone-like armor, similar to other demons such as the Hideous Mass and Leviathan, with its main weakpoint located on the fleshy guts hanging underneath it, incentivizing using weapons such as Shotguns, Nailguns, explosives such as Projectile Boosts, Core Ejects and Rockets, and the S.R.S Cannonball. Sawtraps are also useful for dealing with the Minotaur if the magnet is placed on the edge of the carts to make it easier to hit it. The player can also hit the Minotaur on its back by riding it, however with it being risky to perform due to its attacks and constant movement.
End
After the ![]()
Minotaur is seemingly defeated, the carts will stop, one of which (replacing the last broken cart) will wait at the end of the line, housing a Stray for the player to heal up.
The tram exit leads to a corridor, which leads upstairs to a waiting station with an exit door. Upon arrival, the exit will open. However, moving deeper inside causes it to immediately close, and the Minotaur will burst out a pillar, destroying parts of the room and commencing the second phase of the fight. In this encounter, it has 4 main attacks:
- A four-hit combo, one wide horizontal swing at the beginning and end, one diagonal swing, one overhead swing. It will always start with this attack.
- A lunge charging towards the player, briefly indicated by a yellow flash.
- An acid burst, where the Minotaur emits a toxic substance in a medium radius around it. The tiles affected by the radius will have the acid persist for a short duration, and multiple acid zones can simultaneously persist on the arena.
- A hammer plunge, where the Minotaur will thrust down its hammer, creating an explosive attack in a large radius. It is immobilized during this attack.
The ![]()
Minotaur, now with partially exposed flesh, only has half of its health left, making targetting easier. As it still retains high agility and attack lethality, it is advisable to restrict constant movement, and ultilize high-damaging weapons such as the Railgun, Shotgun and Rockets to deal with it. Some of its attacks can be used as offensive opportunities - the lunge can be countered with a Ground Slam, and the hammer plunge helps the player to safely reposition themselves and dish out great damage.
Defeating the Minotaur will reopen the exit door.
Challenge
- This section covers the secret boss fight for Big Johninator, as well as the boss fight's rewarded secret hint. For more information on the enemy, see Big Johninator. For the attached secret, see 7-3: No Sound, No Memory.
For the level's challenge, the player needs to defeat ![]() Big Johninator, which acts as the Joke/Reference Boss for Act III (in the same category as
Big Johninator, which acts as the Joke/Reference Boss for Act III (in the same category as ![]() Very Cancerous Rodent and
Very Cancerous Rodent and ![]() Mysterious Druid Knight (& Owl).) To access the arena to fight Big Johninator, a hint can be found by the open region revealed after the
Mysterious Druid Knight (& Owl).) To access the arena to fight Big Johninator, a hint can be found by the open region revealed after the ![]()
Minotaur charges through the doors. At the far wall lies a walkway with an open door to the western end.
Heading inside will reveal a small room with a mural, depicting a Mannequin with its head replaced with a Blue Skull, in reference to the headless Mannequin where the player acquires the Red Skull from. Taking the Blue Skull given later on in the level and placing it on the headless Mannequin back at the start will cause a portion of the nearby wall to slide out, leading down to a staircase into a large open courtyard.
Approaching the center of the courtyard will cause a large missile to crash into the ground, with it revealing ![]() Big Johninator after it explodes.
Big Johninator after it explodes.
Secret Boss Encounter
![]() Big Johninator is a fast and incredibly dangerous enemy, as well as being hard to hit with its mobility.
Big Johninator is a fast and incredibly dangerous enemy, as well as being hard to hit with its mobility. ![]() Big Johninator has two main attacks, with it occasionally spawning Landmines around the arena which activate when the player is nearby:
Big Johninator has two main attacks, with it occasionally spawning Landmines around the arena which activate when the player is nearby:
- A barrage of 3 Rockets, similar to those found on the
 Guttertank.
 - A
 Malicious Face beam, dealing 50 damage on hit.
Keeping mobile by dash-jumping and slide hopping around the arena is good for dodging its rockets and beams. Staying too close to ![]() Big Johninator along with slow aerial movement though should be avoided at all costs, as its rockets can easily kill the player if connected.
Big Johninator along with slow aerial movement though should be avoided at all costs, as its rockets can easily kill the player if connected.
To combat it, utilizing the Marksman and other hitscans that can interact with it, such as the Railcannons, is a good choice to combat with ![]() Big Johninator's aggressive, fast movement. Saw-traps are also a good choice for passive damage when
Big Johninator's aggressive, fast movement. Saw-traps are also a good choice for passive damage when ![]() Big Johninator is on the ground. Utilizing magnets on
Big Johninator is on the ground. Utilizing magnets on ![]() Big Johninator can make the fight significantly easier, as its rockets will home in on the magnet instead of at the player. Freezing its rockets with the Freezeframe Rocket Launcher is also extremely useful, since it will keep the rockets away from hitting the player, and
Big Johninator can make the fight significantly easier, as its rockets will home in on the magnet instead of at the player. Freezing its rockets with the Freezeframe Rocket Launcher is also extremely useful, since it will keep the rockets away from hitting the player, and ![]() Big Johninator will often run into the rockets itself when it fires them, dealing significant damage on hit. Frozen rocket explosions can also launch
Big Johninator will often run into the rockets itself when it fires them, dealing significant damage on hit. Frozen rocket explosions can also launch ![]() Big Johninator into the air, keeping it stuck airborne for easy damage. The player can also parry its landmines when activated, giving the player the health and stamina refill while also creating a large explosion on impact.
Big Johninator into the air, keeping it stuck airborne for easy damage. The player can also parry its landmines when activated, giving the player the health and stamina refill while also creating a large explosion on impact.
Killing ![]() Big Johninator will reveal a secret stone tablet, which slides out of the floor on the platform in the center of the arena. The stone tablet can be picked up and read, which gives a hint to access 7-S: Hell Bath No Fury:
Big Johninator will reveal a secret stone tablet, which slides out of the floor on the platform in the center of the arena. The stone tablet can be picked up and read, which gives a hint to access 7-S: Hell Bath No Fury:
Dead end after dead end. Is there really no way out?
Get lost in the labyrinth, die in the battlefield, or get lost in the forest...
I thought I saw a way out there, a gate covered by foliage... But even with all
our strength we couldn't get through.
I doubt there's any blade sharp enough to cut the vines, and no fire we've tried
has been hot enough... It's possible that those flamethrower wielding machines
might be able to burn through it, but their weapons become unusable when they die.
Secrets
| #1 | |
| #2 | |
| #3 | |
| #4 | |
| #5 |
Easter Eggs
- An entrance blocked by rubble located near the outdoor region of the first
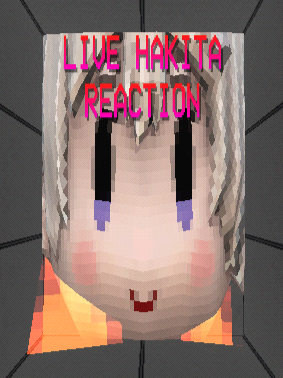
Minotaurencounter can be noclipped through, revealing a large outstretched plushie of Lead Developer Hakita captioned with "LIVE HAKITA REACTION" and a wall of fire behind it. Touching Hakita kills the player instantly.- The easter egg was added to reference the Live Dillon Reaction easter egg in Gloomwood
Trivia
- 7-1 has no upper limit on kills, as the player can stall in the tram chase with the
Minotaurindefinitely, farming Strays that appear on new trams. - The α symbol was chosen as more buttons were planned, such as one with the β symbol.
- The level is named after "The Garden of Forking Paths", a short story by Jorge Luis Borges following a spy during the first World War as he learns about his famous ancestor's plan to construct a labyrinthine novel which covers the full range of possible branching timelines its story can go through.
- The crossing out of the boss name "
Minotaur", and the crossing out in red text of its terminal data, is a reference to Mark Z. Danielewski's book, House of Leaves. Wherein every mention of theMinotaurin Danielewski's book is crossed out due to, as some interpret it, an expression of artists desiring to destroy their own work.[1] - The names of the level's soundtracks, "The World Looks White" and "The World Looks Red", are a reference to the Swans song "The World Looks Red / The World Looks Black".


