4-2: God Damn the Sun
| 4-2: GOD DAMN THE SUN | |||
|---|---|---|---|
| |||
| General | |||
| Layer & Part | GREED /// SECOND | ||
| Challenge | Kill the Insurrectionist in under 10 seconds. | ||
| Music | Sands of Tide | ||
| Tip of the Day | |||
POWER-UPS can be stacked.
| |||
| Collectables | |||
| Enemies | |||
| Rank Requirements | |||
| Rank | Time | Kills | Style |
| S | 04:40 | 69 | 18,000 |
| A | 05:30 | 60 | 16,000 |
| B | 07:00 | 50 | 12,000 |
| C | 12:00 | 35 | 7,500 |
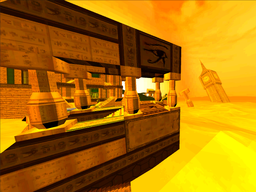
4-2: GOD DAMN THE SUN is the second level of Greed, introducing the Sanded buff, ![]() Stalkers, reloadable checkpoints and starring the
Stalkers, reloadable checkpoints and starring the ![]() Sisyphean Insurrectionist as a boss encounter. 4-2 also holds the entrance to Greed's secret level: 4-S: Clash of the Brandicoot. The level takes place in a desert of ruins and monuments, with golden sand that hurts to the touch. The song which plays in this level is Sands of Tide.
Sisyphean Insurrectionist as a boss encounter. 4-2 also holds the entrance to Greed's secret level: 4-S: Clash of the Brandicoot. The level takes place in a desert of ruins and monuments, with golden sand that hurts to the touch. The song which plays in this level is Sands of Tide.
Level
Start
4-2 starts off with the player entering into a landscape of golden dunes, with various ruined structures embedded in the sand. In the distance lies various monuments and landmarks, such as the Eiffel Tower, Statue of Liberty and Big Ben, with a large pyramid towering nearby the level.
In front of the entrance lies a set of 2 platforms, where 8 ![]() Filth will spawn and run towards the player, before stepping onto the sandy surface and immediately ignite in flames, teaching the player about the hazardous sand.
Filth will spawn and run towards the player, before stepping onto the sandy surface and immediately ignite in flames, teaching the player about the hazardous sand.
The path forward contains various small platforms within the sand that the player needs to jump across to move forward. Walking forward will cause 2 ![]() Strays to spawn on a set of stone pillars.
Strays to spawn on a set of stone pillars.
Moving forward will lead to a small gazebo with two Cerberus statues. This area introduces the Sanded enemy buff: which removes the ability for the player to heal from an enemy's blood, with parries being the only option for health regain. A prompt will trigger detailing its effects:
The right ![]() Cerberus statue will then awake with the sanded buff applied to it.
Cerberus statue will then awake with the sanded buff applied to it.
Ruined Tower
Afterwards lies more stone platforms and ruins toppled over within the sand that the player must traverse, eventually making it over to a checkpoint. There, moving forward will trigger an encounter with 1 Sanded ![]() Malicious Face and 2
Malicious Face and 2 ![]() Soldiers further along the platforms.
Soldiers further along the platforms.
The player will then reach a large tower, with set of staircases leading up to a raised segment of the structure. Moving up the stairs will trigger a wave of enemies to spawn, consisting of a ![]() Malicious Face at the bottom stairs, 5 sanded
Malicious Face at the bottom stairs, 5 sanded ![]() Filth on a lower walkway, 3 sanded
Filth on a lower walkway, 3 sanded ![]() Soldiers, and a
Soldiers, and a ![]() Virtue on the highest section of the ruin.
Virtue on the highest section of the ruin.
Once all the enemies are defeated, 4 pillars will rise out of the sand, leading to the next arena.
Temple Entrance
The next segment of the level consists of a large stage connecting to 2 sets of staircases leading to the entrance of a large temple, with the entrance blocked off by a gate. 2 ![]() Cerberi statues lie within the middle of the staircases, and 2 other staircases lead down to the desert floor.
Cerberi statues lie within the middle of the staircases, and 2 other staircases lead down to the desert floor.
Walking up to the gated entrance will summon an introduction to the ![]() Stalker: shambling husks strapped with large explosive canisters, which upon detonation will afflict enemies the Sanded buff upon contact, demonstrated with a
Stalker: shambling husks strapped with large explosive canisters, which upon detonation will afflict enemies the Sanded buff upon contact, demonstrated with a ![]() Malicious Face trapped alongside the Stalker. The Malicious Face will come close to the Stalker as it actively tries to peruse towards it before exploding, killing itself in the process.
Malicious Face trapped alongside the Stalker. The Malicious Face will come close to the Stalker as it actively tries to peruse towards it before exploding, killing itself in the process.
The gate will then unlock, and the player will then have to fight the sanded Malicious Face. Once it is killed, 3 more Stalkers will spawn in and the 2 ![]() Cerberi statues from earlier will awake, with the Stalkers actively heading towards them. Once all enemies are defeated, the doors will open and the player can traverse into the temple.
Cerberi statues from earlier will awake, with the Stalkers actively heading towards them. Once all enemies are defeated, the doors will open and the player can traverse into the temple.
Solarium
The door will lead to a large sunlit temple area, with 2 doors to the left and right and a door at the far end, with the side doors being marked with a Blue and Red mural of a Malicious Face, and the far door leading outside to a set of platforms near the exit gate, with a Blue and Red Pedestal on each side which correspond to the 2 side rooms, each containing one of the needed skulls. On a walkway within the center of the room lies a circular checkpoint, which can be interacted with multiple times to save progress. On the same walkway near the entrance is a small pedestal with a book on top to read:
"It has been days since we last saw any angels. Without their oppression, there is no need for us to carry on our punishment. Even the meekest of the damned have abandoned their penance to take up arms. All can see how they have robbed us of our minds, bodies, and souls, leaving us only the hopes of a salvation that will never come, but no longer.
King Sisyphus has acted in secret until now, amassing an army whose strength and numbers swell, but now there is no need to hide anymore. We have lived in the shadow of Heaven long enough to forget the taste of fear. Now the Sisyphean Insurrectionists prepare for war.
I have heard of Minos beginning a peaceful revolution, but our King Sisyphus knows such pacificity will gain no favor form our cruel captors. He knows that one can only fight power with power, and he shall lead us to freedom.
REMAINING TEXT: IRRELEVANT.
Blue Skull Arena
Heading to the left doorway will lead to a large greenhouse section of the temple, with glass windows, flower beds, and the Blue Skull protected by a shielding of glass. Within the middle of the arena lies a Dual Wield powerup for the player to use.
Walking forward will trigger an enemy wave consisting of 4 ![]() Schisms, 4
Schisms, 4 ![]() Drones, 5
Drones, 5 ![]() Soldiers, and 2
Soldiers, and 2 ![]() Stalkers to appear, with the Schisms and Soldiers placed at each end of the hallway next to a Stalker. Killing either group of husks will spawn 1
Stalkers to appear, with the Schisms and Soldiers placed at each end of the hallway next to a Stalker. Killing either group of husks will spawn 1 ![]() Malicious Face and 1
Malicious Face and 1 ![]() Virtue to spawn on the opposite side adjacent from the group's location, and killing the other set of husks will spawn another set of 1 Malicious Face and 1 Virtue. Once all defeated, the player can grab the Blue Skull and place it by the pedestal near the exit gate.
Virtue to spawn on the opposite side adjacent from the group's location, and killing the other set of husks will spawn another set of 1 Malicious Face and 1 Virtue. Once all defeated, the player can grab the Blue Skull and place it by the pedestal near the exit gate.
Notably, this room's door does not lock during its combat encounters, allowing the player to collect this room's Dual Wield then quickly leave to collect the Red Skull Arena's Dual Wields before the first power-up timer expires.
Red Skull Arena
Heading through the right door of the temple will lead to an outdoor arena, consisting a main set of tightknit stairways and platforms leading down to the Red Skull, with a pit of breakable glass panes in front. In front of the player lies another Dual Wield powerup.
Moving forward towards the Dual Wield will cause 3 ![]() Malicious Faces to spawn, with one directly in front of the player and 2 beside the Red Skull. Killing the Malicious Face in front of the player will spawn 4
Malicious Faces to spawn, with one directly in front of the player and 2 beside the Red Skull. Killing the Malicious Face in front of the player will spawn 4 ![]() Streetcleaners to spawn at the bottom floor, killing the Malicious Face to the right will spawn 2
Streetcleaners to spawn at the bottom floor, killing the Malicious Face to the right will spawn 2 ![]() Schisms, 3
Schisms, 3 ![]() Soldiers, and a
Soldiers, and a ![]() Stalker, and killing the Malicious Face to the left will spawn 4
Stalker, and killing the Malicious Face to the left will spawn 4 ![]() Drones and a
Drones and a ![]() Virtue. Once all the enemies are killed, the Red Skull will unlock, and the player can then head down to place it onto the pedestal.
Virtue. Once all the enemies are killed, the Red Skull will unlock, and the player can then head down to place it onto the pedestal.
Boss Encounter
The path that leads to the 2 pedestals has various routes that the player can take, with going onto a set of stairways from the temple or platforming across various pillars, leading to a platform with a checkpoint and a Terminal before the exit gate.
Once the player has completed both arena encounters and collected each of the Skull Keys, placing both onto the pedestal will cause an air raid siren to rise out of the platform nearby the elevator gate, with it then playing a long droning bellow. As it calls, a ![]() Sisyphean Insurrectionist will heed the message and drop down out of the sky to face the player before quickly starting the boss fight.
Sisyphean Insurrectionist will heed the message and drop down out of the sky to face the player before quickly starting the boss fight.
The ![]() Sisyphean Insurrectionist, or simply Insurrectionist, is a large highly mobile enemy: attacking with sweeps, clubs, and jabs from the dead
Sisyphean Insurrectionist, or simply Insurrectionist, is a large highly mobile enemy: attacking with sweeps, clubs, and jabs from the dead ![]() Malicious Face attached to its highly extendable arm, allowing it to attack the player from a very large distance. The Insurrectionist can also jump across vast distances to chase the player if it needs, and will regularly jump high into the air to either slam to the ground or toss a boulder throw.
Malicious Face attached to its highly extendable arm, allowing it to attack the player from a very large distance. The Insurrectionist can also jump across vast distances to chase the player if it needs, and will regularly jump high into the air to either slam to the ground or toss a boulder throw.
While high in health, the Insurrectionist will also take additional damage while lit on fire, from sources such as explosives or the ![]() Overheat Nailgun, and the player can also stun the Insurrectionist by successfully parrying it's boulder back at it, or using the
Overheat Nailgun, and the player can also stun the Insurrectionist by successfully parrying it's boulder back at it, or using the ![]() S.R.S. Rocket Launcher's cannonball to knock it down.
S.R.S. Rocket Launcher's cannonball to knock it down.
Once the Insurrectionist is defeated, the exit gate will open and the player can finish the level.
Challenge
For the level's challenge, the player has a couple of options to complete it. The player can avoid the ![]() Dual Wield Orbs for the enemy encounters in their arenas, then use all of them at once to stack a large amount of damage at the Insurrectionist at once, being most effective with
Dual Wield Orbs for the enemy encounters in their arenas, then use all of them at once to stack a large amount of damage at the Insurrectionist at once, being most effective with ![]() Nailgun or
Nailgun or ![]() Sawblade traps, explosives such as from
Sawblade traps, explosives such as from ![]() Projectile Boosting or
Projectile Boosting or ![]() Rockets, or using advanced techniques such as
Rockets, or using advanced techniques such as ![]() Railcoining or Shotgun Swapping.
Railcoining or Shotgun Swapping.
The alternative method involves needing the ![]() Whiplash to place the skulls from a distance. After completing the Blue Skull arena and placing it, the player needs to head over to the Red Skull arena and complete it as well. Nearby the pedestal where it is held is a pit with a floor of glass panes, which drops down to a bottomless pit. By standing on the glass pit and then placing the skull on the far pedestal with the Whiplash, it will trigger the Insurrectionist to spawn, where it will then jump to directly above the player before it falls directly into the pit where the player is standing on and instantly gets killed, granting the challenge.
Whiplash to place the skulls from a distance. After completing the Blue Skull arena and placing it, the player needs to head over to the Red Skull arena and complete it as well. Nearby the pedestal where it is held is a pit with a floor of glass panes, which drops down to a bottomless pit. By standing on the glass pit and then placing the skull on the far pedestal with the Whiplash, it will trigger the Insurrectionist to spawn, where it will then jump to directly above the player before it falls directly into the pit where the player is standing on and instantly gets killed, granting the challenge.
Secrets
| #1 | 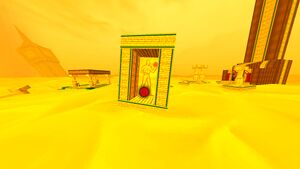
| |
| #2 | 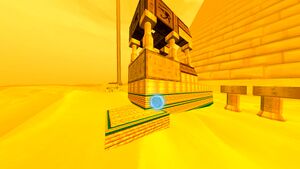
| |
| #3 | 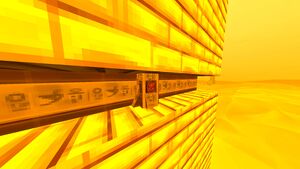 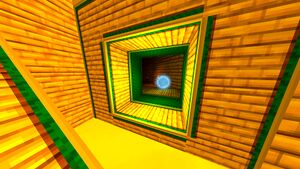
| |
| #4 | 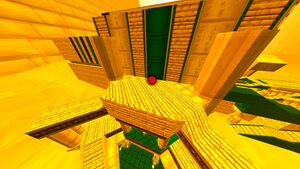
| |
| #5 | 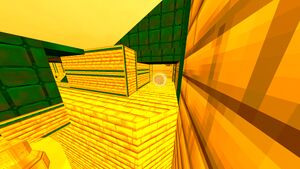
|
Secret Level Entrance
To find the hidden secret exit in 4-2, the player will need to first perform the steps that were used to find the third ![]() Soul Orb. The player needs to head over to the outside of the room with the Blue Skull key, to the left of the temple building. Making it to the far end of the building, the player can find a small crevasse within the wall holding a stone button, with a depiction of a
Soul Orb. The player needs to head over to the outside of the room with the Blue Skull key, to the left of the temple building. Making it to the far end of the building, the player can find a small crevasse within the wall holding a stone button, with a depiction of a ![]() Malicious Face carved into it. If the player decides to press it, the button will light up with a yellow glow, and a short message will appear:
Malicious Face carved into it. If the player decides to press it, the button will light up with a yellow glow, and a short message will appear:
This button corresponds to a door with the same symbol, located by the entrance to the temple near the bottom right staircase. Pressing it will open the door, which leads to a small dim room with a special torch-like item with a crystalline crescent moon on top.
The player then needs to take the torch and climb up to the top of the temple's roof, where a pedestal lies at the far end from the entrance. Placing the moon key onto it will cause the entire level to shift to night time, which afterwards cannot be reverted. Due to Greed's sun being now removed, the dunes of the desert are now no longer blasted with heat, making them safe to traverse across. In the far distance by the start of the level is a distant bright light, which the player must head towards. Making it over will reveal the hidden secret exit underneath the bright sphere of light. The player can descend down through to exit the level, leading to 4-S: Clash of the Brandicoot.
Sandcastle Easter Egg
Behind the large Statue of Liberty in the far distance, the player can find a lone ![]() Stalker sitting against the base of the monument, portrayed building a small sandcastle.
Stalker sitting against the base of the monument, portrayed building a small sandcastle.
If the player decides to destroy the sandcastle, a massive explosion will occur, which cannot be survived by any normal means, instantly killing the player. The explosion will eventually make its way to the rest of the level, killing all enemies except for ![]() Malicious Faces and enemies marked as invincible. The sandcastle will not persist through checkpoints.
Malicious Faces and enemies marked as invincible. The sandcastle will not persist through checkpoints.
Trivia
- The title of the level is a reference to "God Damn the Sun" from the album The Burning World by Swans.


