5-1: In the Wake of Poseidon
| 5-1: IN THE WAKE OF POSEIDON | |||
|---|---|---|---|

| |||
| General | |||
| Layer & Part | WRATH /// FIRST | ||
| Challenge | Don't touch any water. | ||
| Music | Deep Blue | ||
| Tip of the Day | |||
Falling underwater is slow, but a ground slam allows for a quick return to the ground.
| |||
| Collectables | |||
| Enemies | |||
| Rank Requirements | |||
| Rank | Time | Kills | Style |
| S | 06:05 | 67 | 20,000 |
| A | 06:40 | 60 | 17,500 |
| B | 08:00 | 50 | 10,000 |
| C | 10:00 | 35 | 4,500 |
5-1: IN THE WAKE OF POSEIDON is the first level of Wrath, premiering ![]() Blue Hookpoints and serving as a testing ground for the
Blue Hookpoints and serving as a testing ground for the ![]() Whiplash with its negated hard damage while underwater. 5-1 also introduces the
Whiplash with its negated hard damage while underwater. 5-1 also introduces the ![]() Sentry, and contains the entrance to Wrath's secret level: 5-S: I Only Say Morning. The song used in this level is Deep Blue.
Sentry, and contains the entrance to Wrath's secret level: 5-S: I Only Say Morning. The song used in this level is Deep Blue.
Level
Start
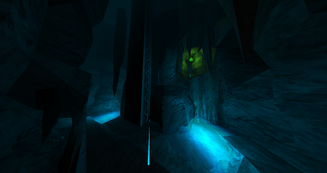
5-1 starts off in tall, dimly lit cavern, with pools of water, dripping stalactites, and large pillars of metal and machinery strewn against the walls.
Moving forward through the cave will find a green Hookpoint spotted next to an opening, which upon hooking it with the ![]() Whiplash will send the player into a small passageway.
Whiplash will send the player into a small passageway.
The passageway leads to a tall shaft within the cavern with a Blue Hookpoint placed above, with a prompt appearing detailing their behavior:
Hooking onto it will send the player flying up to the next opening, where they find a long tunnel with a Blue Hookpoint above a massive pit. Making it over will lead to a tight winding tunnel, with the player eventually making it down a sharp drop into the cave below.
Main Cave
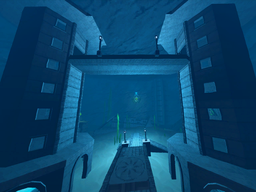
The player drops down into a large submerged cavern, with the remains of sunken buildings and ruins throughout. In the distance, three circular doors can be seen, each with a Hookpoint and a skull shaped display above. Behind where the player drops down are 3 Blue Pedestals, requiring the player to collect 3 Skull Keys found behind each door's arena to unlock.
Moving forward towards the doors will trigger a message to appear, detailing about the ![]() Whiplash's hard damage reduction while underwater:
Whiplash's hard damage reduction while underwater:
Go nuts, have fun.
Continuing past will then cause the doors to lock, and spawn in a wave of 2 ![]() Strays, 2
Strays, 2 ![]() Drones, 4
Drones, 4 ![]() Soldiers, and a
Soldiers, and a ![]() Virtue, with killing them unlocking the doors to progress.
Virtue, with killing them unlocking the doors to progress.
Room A
Entering the door to the left will lead to a large vertical room submerged in water, with a set of platforms by the entrance and the far side of the room, and one lower down in the center, each with a set of Hookpoints to traverse across with. At the far end of the room lies the skull key.
Making it to the middle platform will spawn a wave of 2 ![]() Strays, 2
Strays, 2 ![]() Soldiers, a
Soldiers, a ![]() Virtue and a
Virtue and a ![]() Malicious Face, with the Soldiers in the middle platform and the rest on the far side of the room. Killing the Virtue or Malicious Face will spawn in the same amount of enemies as the first wave, but on the room's opposing side. Killing all the enemies will unlock the Skull Key to collect.
Malicious Face, with the Soldiers in the middle platform and the rest on the far side of the room. Killing the Virtue or Malicious Face will spawn in the same amount of enemies as the first wave, but on the room's opposing side. Killing all the enemies will unlock the Skull Key to collect.
Room B
Moving through the middle room will lead to a large, cavernous area, with a pool of water and a blue Hookpoint above. Up a path winding around the room will lead to the second Skull Key, placed upon a stone platform.
Approaching it will spawn in a wave of 2 ![]() Malicious Faces, 2
Malicious Faces, 2 ![]() Streetcleaners, and 4
Streetcleaners, and 4 ![]() Filth. Killing all the enemies will spawn in another wave, consisting of 4
Filth. Killing all the enemies will spawn in another wave, consisting of 4 ![]() Strays, 2
Strays, 2 ![]() Streetcleaners, a
Streetcleaners, a ![]() Mindflayer and a
Mindflayer and a ![]() Virtue. Once all enemies are dead, the skull key will unlock to be collected.
Virtue. Once all enemies are dead, the skull key will unlock to be collected.
Room C
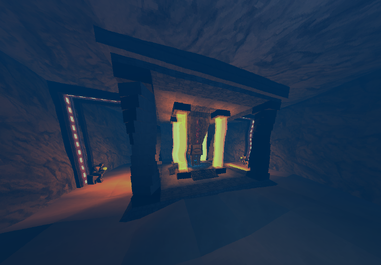
Going through the door to the right will lead to a small underwater room, with a central platform with the Skull Key surrounded by 4 pillars of orange light, connected to a set of moving tracks along the walls. Moving forward will cause 2 ![]() Cerberi to awake from their positions by the left and right wall, with a
Cerberi to awake from their positions by the left and right wall, with a ![]() Malicious Face spawning at the far end of the room. Killing all the enemies will unlock the final Skull to open the door.
Malicious Face spawning at the far end of the room. Killing all the enemies will unlock the final Skull to open the door.
Elevator
Placing all the Skulls on the pedestals in the main room will unlock the door forward, leading to a series of pressured tunnels. Within the first tunnel lies a bounce pad at the far end of the room. Walking up to it will cause 2 ![]() Streetcleaners and a
Streetcleaners and a ![]() Schism to appear in front of the player.
Schism to appear in front of the player.
At the end of the room lies the bounce pad, leading up through a tall elevator shaft with a green Hookpoint above. On the sides of the walls are small ledges that the player can also use to jump across.
Continuing from the bounce pad up the shaft, the player will make it to a second tunnel, where 2 ![]() Soldiers and a
Soldiers and a ![]() Drone will spawn in front of the player.
Drone will spawn in front of the player.
Water Processing Chamber
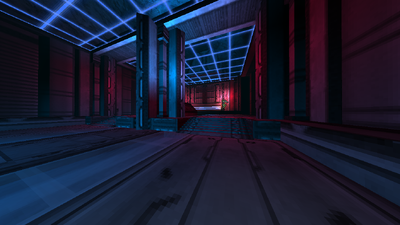
Making it forwards will lead to a set of hallways, strewn with metal pillars, beaming, and advanced machinery. The first hallway has a set of 2 pillars within the middle, and a set of windows on the sides of the room. Moving forward will begin the first introduction to the ![]() Sentries: durable lightweight machines equipped with powerful artillery; able to lock in place and target the player from almost any range as long as they have line of sight.
Sentries: durable lightweight machines equipped with powerful artillery; able to lock in place and target the player from almost any range as long as they have line of sight.
2 ![]() Sentries will spawn in front of the door to the next hallway, with them burrowing into the ground as they line up their shot, making them immovable to most attacks. Upon killing both of the Sentries, a prompt will appear detailing how to interrupt their attack:
Sentries will spawn in front of the door to the next hallway, with them burrowing into the ground as they line up their shot, making them immovable to most attacks. Upon killing both of the Sentries, a prompt will appear detailing how to interrupt their attack:
Knuckleblaster (Red arm) // Railcannon // Ground slam
shockwave // Revolver to the antenna
Making it into the next room will lead to a second hallway, with one pillar in the middle and the floor raised at the far end of the room. 2 more Sentries will spawn in front of the player, before the door opens into the final hallway.
Opening the door will spawn in a wave of 2 ![]() Streetcleaners, 2
Streetcleaners, 2 ![]() Soldiers, and 2 more
Soldiers, and 2 more ![]() Sentries at the far end of the room. Killing the wave will then spawn in another wave of 4
Sentries at the far end of the room. Killing the wave will then spawn in another wave of 4 ![]() Filth, 4
Filth, 4 ![]() Strays, a
Strays, a ![]() Virtue, and 2 more
Virtue, and 2 more ![]() Sentries, with one Sentry near the exit gate with the 4 Strays, and the other Sentry within the previous room, along with the Virtue behind the pillar and the Filth.
Sentries, with one Sentry near the exit gate with the 4 Strays, and the other Sentry within the previous room, along with the Virtue behind the pillar and the Filth.
Once all the enemies are killed, the exit gate will open and allow the player to finish the level.
Challenge
To complete the level challenge, the player needs to find a set of 3 valves hidden within the first room of the level, breaking each one to drain the water.
- The first valve is hidden behind the large metal pillar to the left of the level entrance.
- The second valve can be found after passing the first pool of water, hidden behind a stone wall to the right.
- The third valve is located to the right of the second pool within a cavity above a wall of large stalagmites.
After destroying all three valves, a message notifies the player about the drained water:
It is important to note most, but not all of the water gets drained. The water in the starting cave will remain, and large bodies of water are still found throughout the entire level, as well as smaller bodies of water towards the level's end.
Secrets
| #1 | |
| #2 | |
| #3 | |
| #4 | |
| #5 |
Secret Level Entrance
To enter 5-S: I Only Say Morning, the player must perform the same path to reach the fifth ![]() Soul Orb. Once the player has reached the bounce pad in the Elevator section, find a small breakable grate to the left wall on the first set of ledges to reveal the orb and the Secret Elevator.
Soul Orb. Once the player has reached the bounce pad in the Elevator section, find a small breakable grate to the left wall on the first set of ledges to reveal the orb and the Secret Elevator.
Trivia
- The title of the level is a reference to In the Wake of Poseidon, an album by King Crimson.


